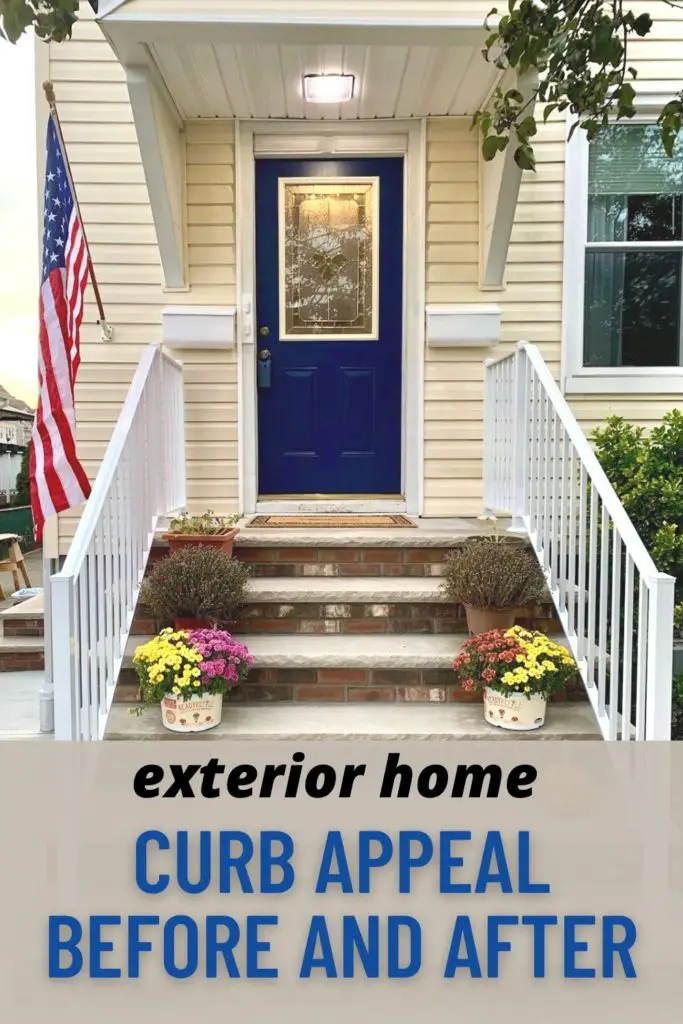
Better Home Curb Appeal Before and After – From Drab to Fab!
This post may contain affiliate links. If you purchase a product through one of them, we will receive a commission at no additional cost to you. As Amazon Associates, we earn from qualifying purchases.
Welcome to our home curb appeal before and after story. We hear about it all the time, but…
…wait, what exactly is curb appeal? Simply: whether or not your house attractive from the “curb,” aka, looking at it from the outside.
Many people are concerned about curb appeal when selling their house, but even if you’re not selling, it’s nice to roll up to your digs and think nice things in your head.
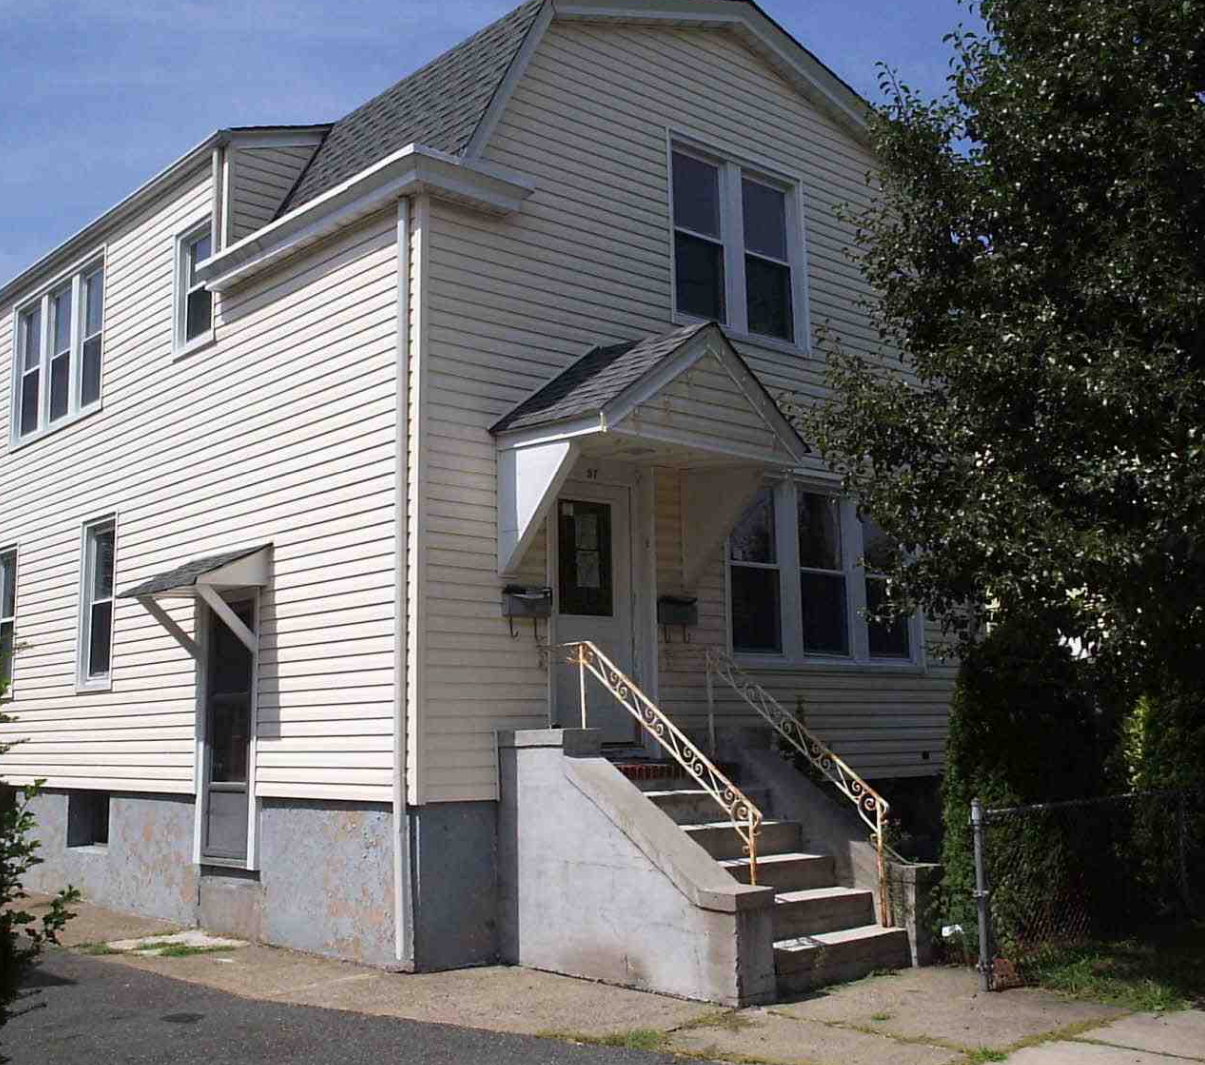
As for our two family… well, you guessed it, like everything else in our house… it was a little lacking.
BLESS MY SOUL, that entrance was one ugly mofo.
Let’s dive in!
The Problems
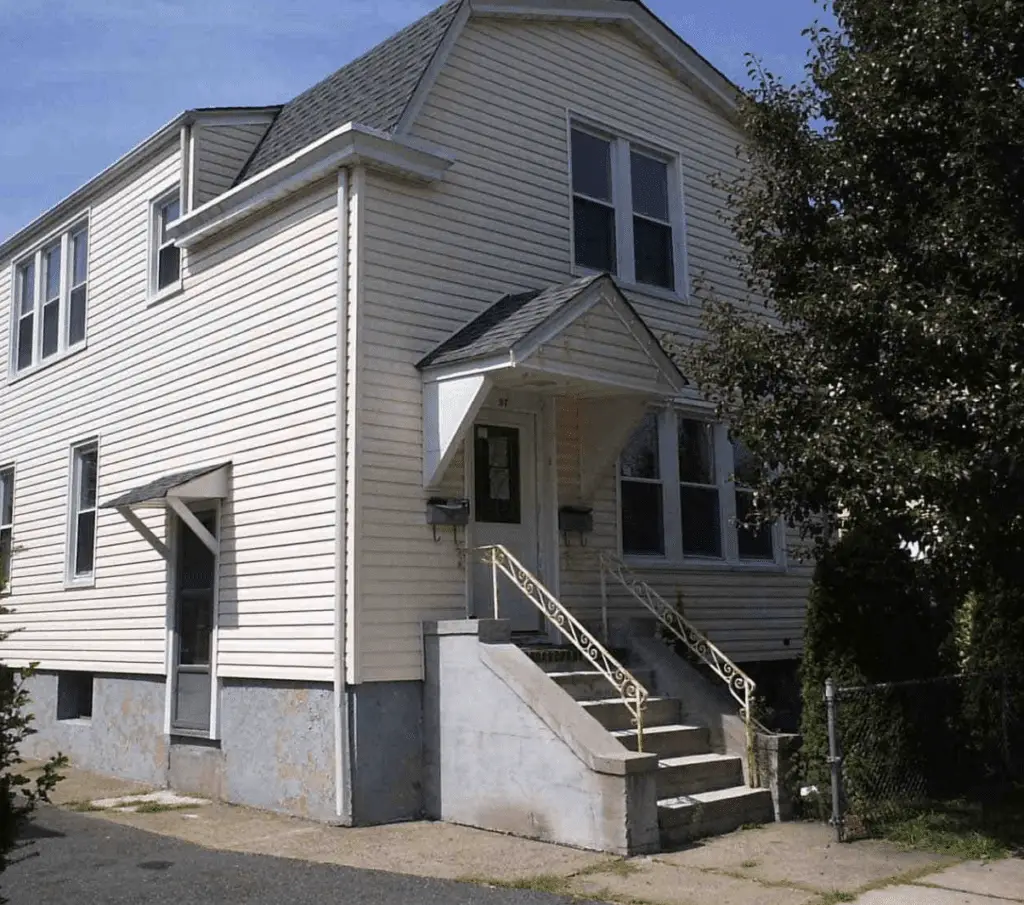
There were four non-cosmetic, pretty bad problems with our front stoop:
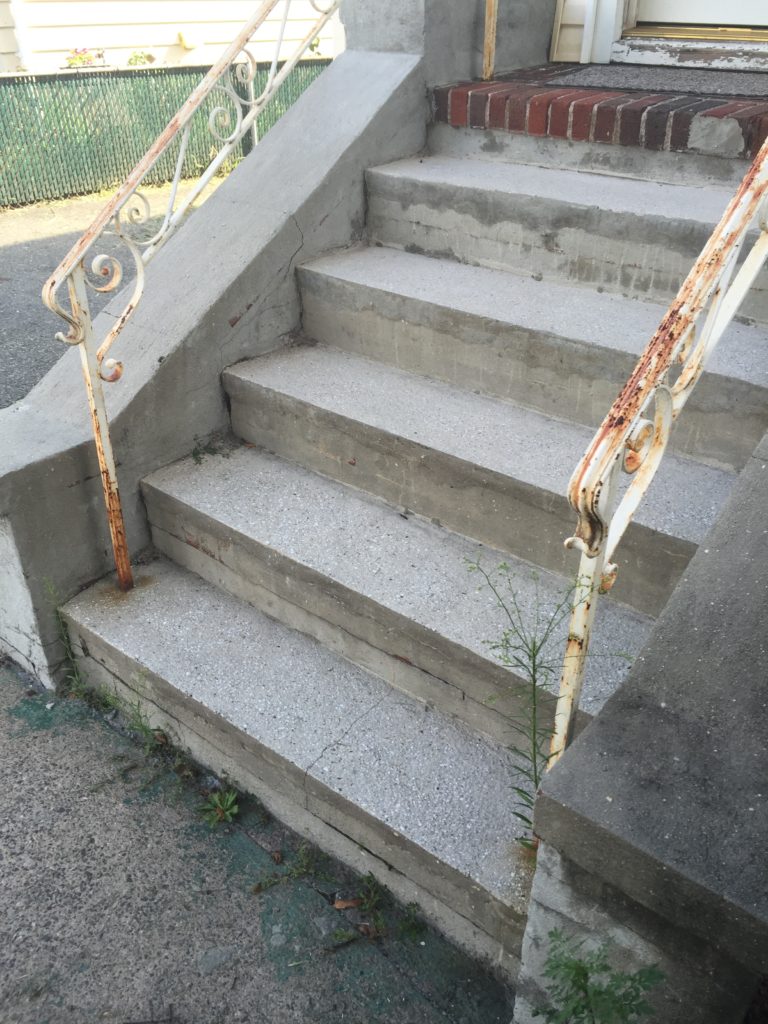
- It appears there once was a red brick staircase, on which was poured an indeterminate amount of concrete, on a Friday at 3pm en route to happy hour. Not only was the cosmetic appearance quite poor, the rise on each step was a different height – ranging from 9” – 10.5”. This, dear OTF fam, is particularly unsafe.
- Add to that, there once was a fence post on the sidewalk, which was clearly sawzalled off in a hurry, leaving behind a fence stump for folks to trip on. Not good, not safe.
- There was an underground gutter that did not work – do you see that little pipe coming down the corner of the house? We surmised it was either blocked or broken, thus causing water to creep into our basement every time it rained. We temporarily fixed it with an elbow and a drain tray, but figured if we’re going to jackhammer the whole thing, we may as well permanently correct it. Furthermore, the sidewalk next to the stair was so uneven that it pooled in the rain, therefore icing regularly in the winter (altogether now: landlord liability!).
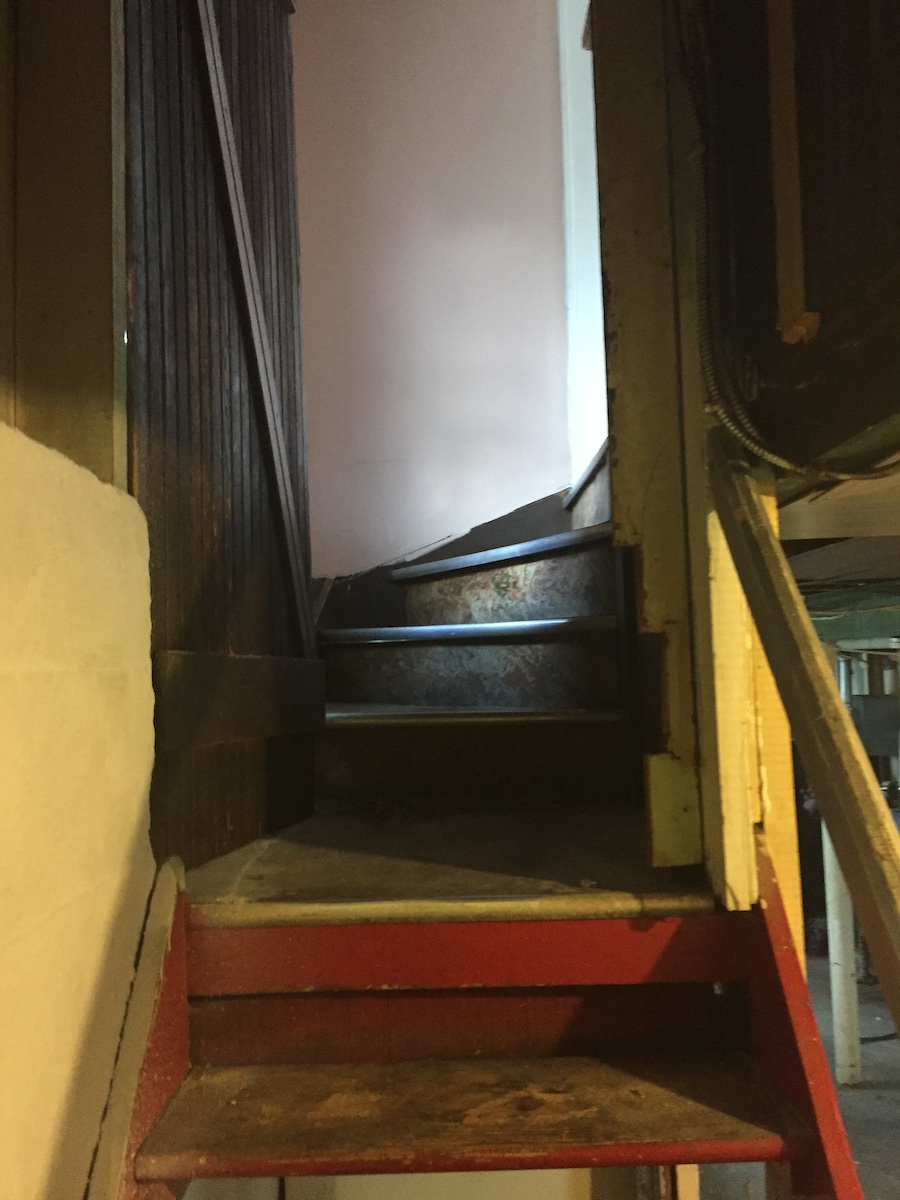
- You may also notice that the side door has a 3-ft drop and no staircase. Funny how these things work out. When we first purchased the house, our 203k required us to fix it. Our terrible contractor subcontracted a terrible mason who poured a terrible staircase. We decided to fix that, too.
In addition to the structural issues, our front stoop boasted a rough look.
The exterior door had a huge dent from our humble but mighty interior staircase install (read all about our old house remodel part four!). We weren’t worried about it at the time – it still worked fine – but renovating the stairs & sidewalk while leaving an ugly door just wouldn’t match.
The mailboxes were probably fifty years old and rusty.
The doorbells didn’t work.
The previous owners apparently had hung their Christmas lights with adhesive Velcro for some godforsaken reason.
It was time for a face lift.
The Functional Fix: Conquering the Yuck
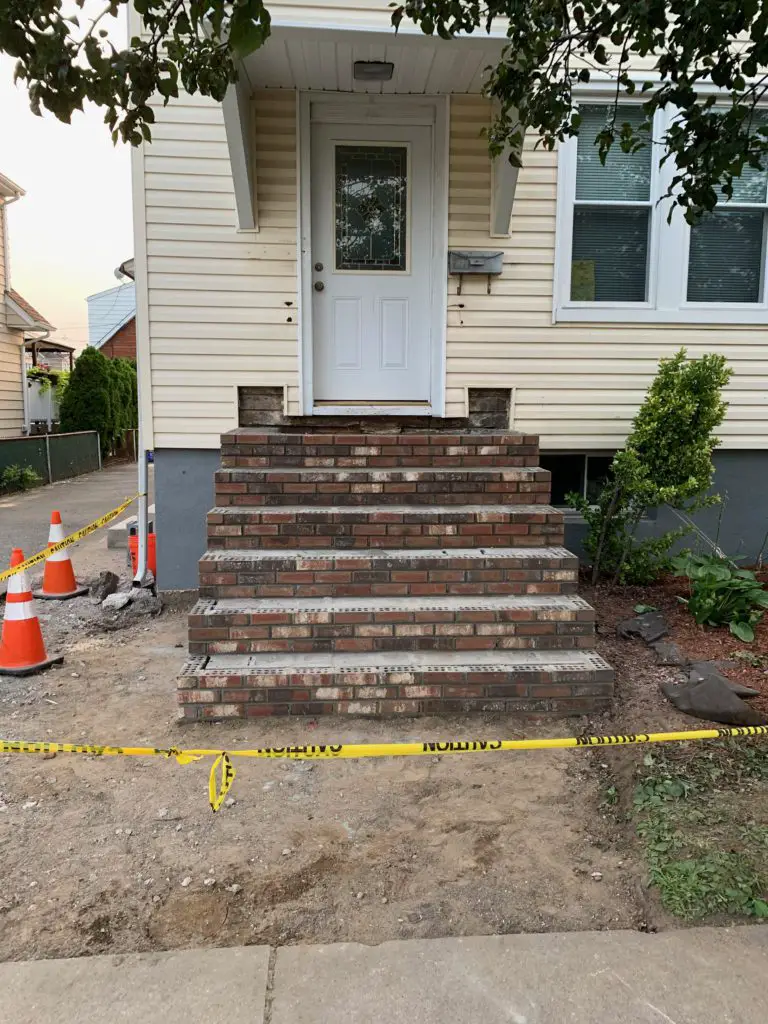
First step in our home curb appeal before and after: we called up our mason.
Our mason a busy man (the good contractors always are) and had a six week wait to get on his schedule. There was no way in creation that we would be attempting to mess with concrete and jackhammers – this would be a point and pay for sure.
Secondly, we waited for a vacancy.
Could we have given our tenants side door access/keys and told them to live with the construction noise for a week? Yes.
Would that have been a giant pain in the ass? Also, yes.
Were they conveniently moving out anyway? You bet.
It was time for an overhaul, and we decided it would be best to have an empty house to do it.
Then, we got to town.
And by “we,” I mean Carmine got his crew together and did his thing. HEAR YE, HEAR YE – IF YOU FIND A GOOD MASON, TREAT HIM WELL.
If, like Peter Cottontail, he decides to swipe fresh tomatoes from your garden, let him. If needs access to a hose or bathroom, allow him.
Masonry, like many trades, is a dying art, and if you look closely, there is a BIG difference between a job done well and a job done poorly.
If the job is done properly, you likely won’t have to touch it again for 50 years.
Hire, pay for and treat well a good mason. You won’t regret it. You only pay for quality once – the first time.
Once Carmine had our steps sparkling (and safe!), we ordered the railing (separate cost… once again, easier to pay good money for a job well done).
Conveniently, Carmine knew a guy. (Surprise, surprise…!)
People that install carpets often know people who undercut doors. People who hang sheetrock often know painters. It’s how they work.
Railing man got it done in an hour and a half. Boom.
The Cosmetic: Making It Nice-Nice
The Siding
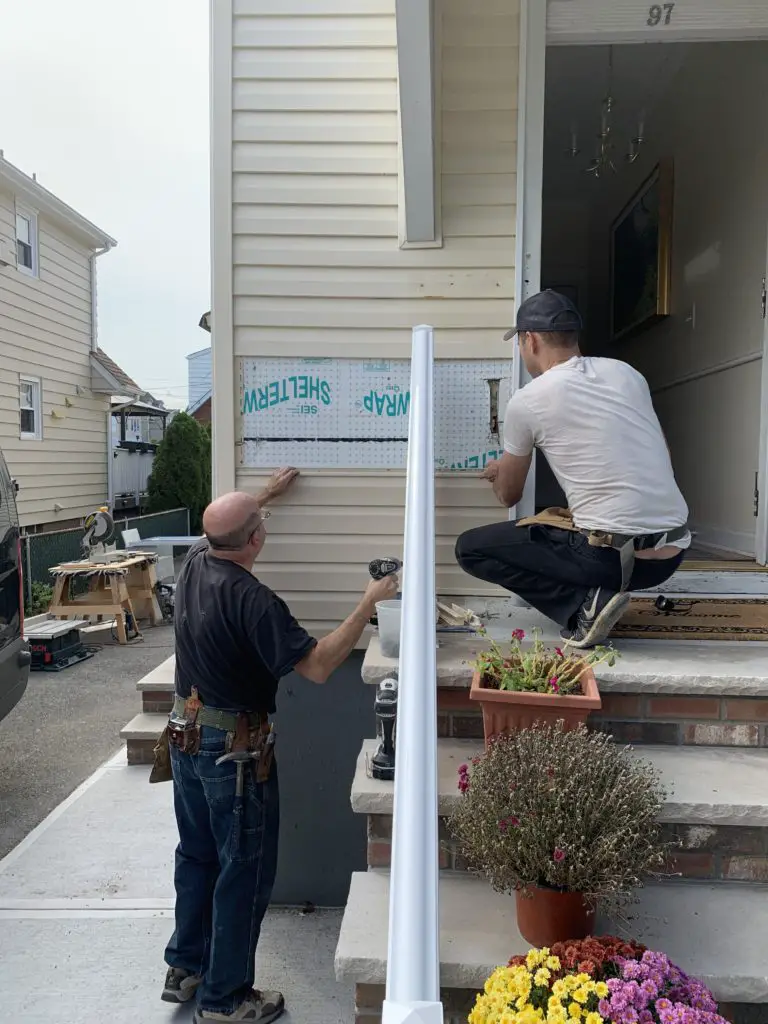
Following the hand rail, it was time for the make-it-pretty phase of our home curb appeal before and after.
Since our previous beloved stoop was a gargantuan piece of concrete, it left us quite a hole to fill in our siding.
I took a scrap piece to a local manufacturer, who kindly called another manufacturer who had the right size, who let me compare and contrast in the middle of their warehouse for color matching.
Miracle of miracles, they had something that looked prettttty close.
Fortunately, this dealer sold siding by the piece (not the box = win!) and we got out of this bit for under $30 in less than a day.
The Busted Front Door
After getting other accessories on order, like mailboxes and doorbells, I got to town on repairing the front door while the boys were working siding.
The short story is, we painted it.
The long story is… here’s how we painted it.
1. Get help to remove the door and set you up with a working space. We had a spectacular September day weather-wise, so we took advantage. I recommend using sawhorses or something similar to get this at working height – save your back!
2. Remove hardware. This includes the hinges and door handles (aka lock set).
3. Clean it! Your front door is probably dirtier than you might think, and we want the paint to stick.
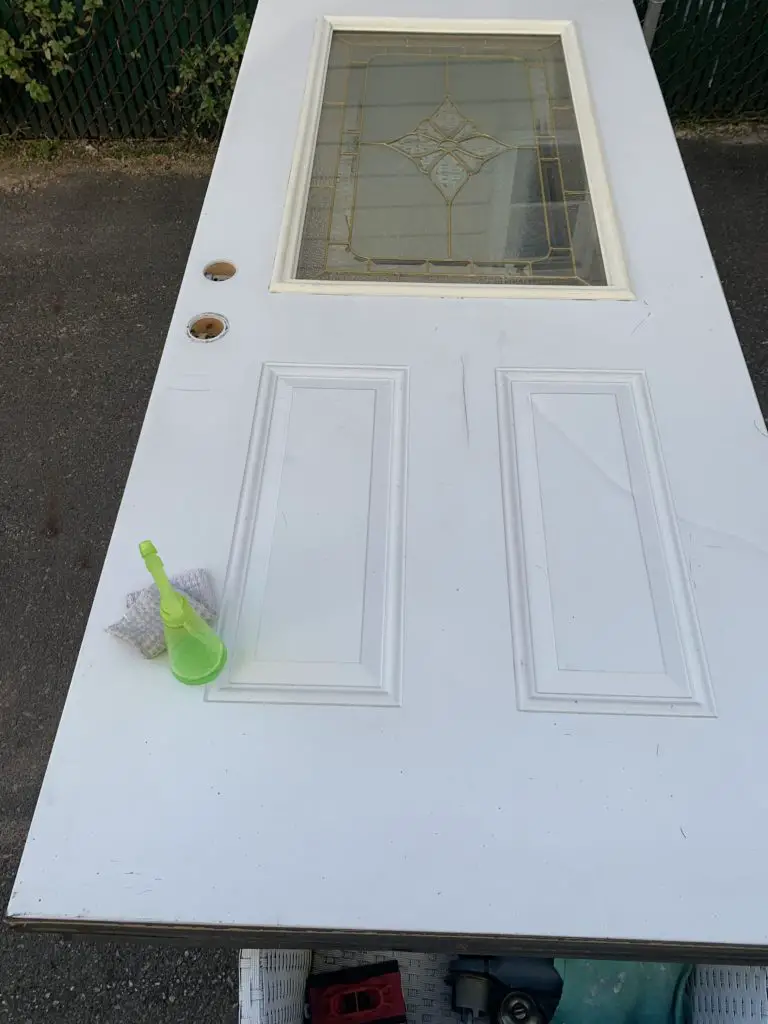
4. Mask up! If you are sanding anything, even outdoors, it is best to wear a face covering.

5. Sand it down. Since we’ll be applying putty, we need to sand off the old paint so the goop adheres well.
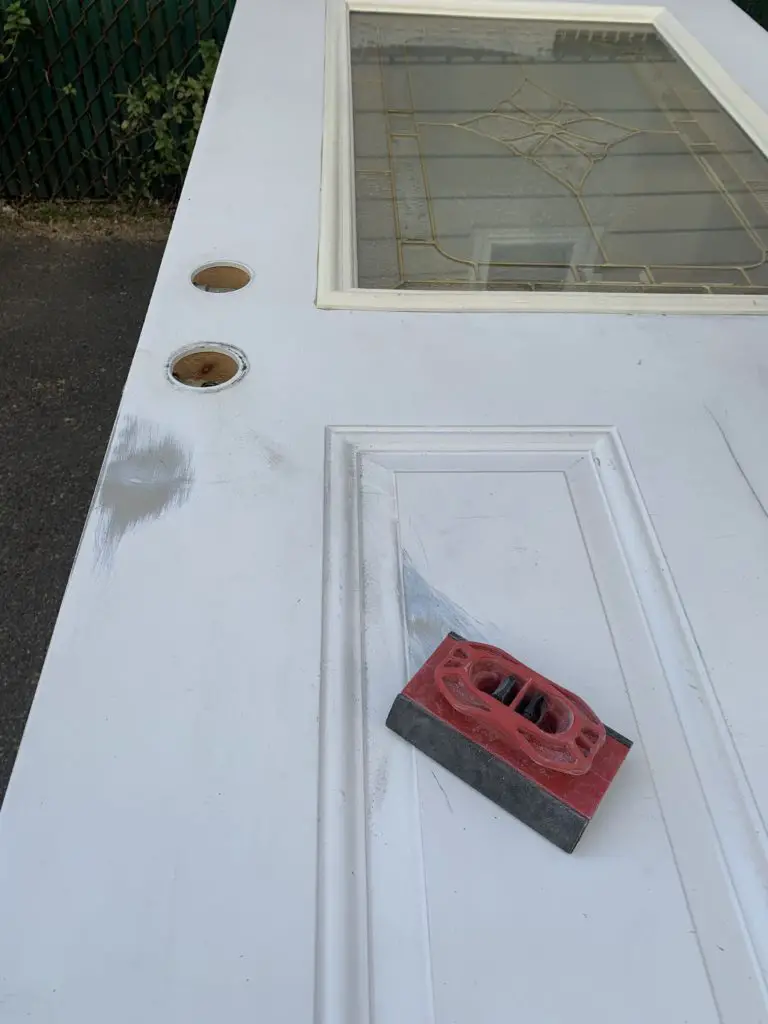
6. Patch. We used an automotive repair kit like this one.
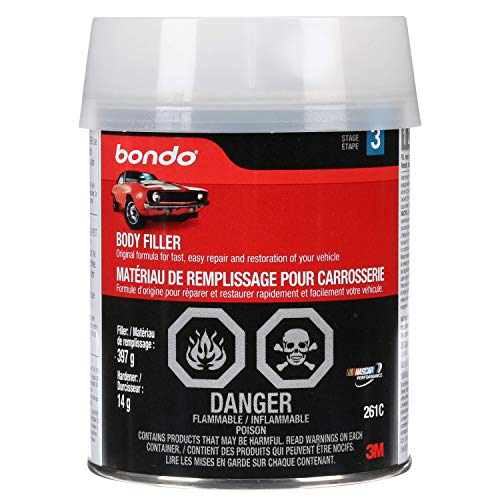
I highly recommend using this outdoors – it’s pretty smelly. Our front door is metal, which is why we needed an auto filler and not something like ordinary joint compound.
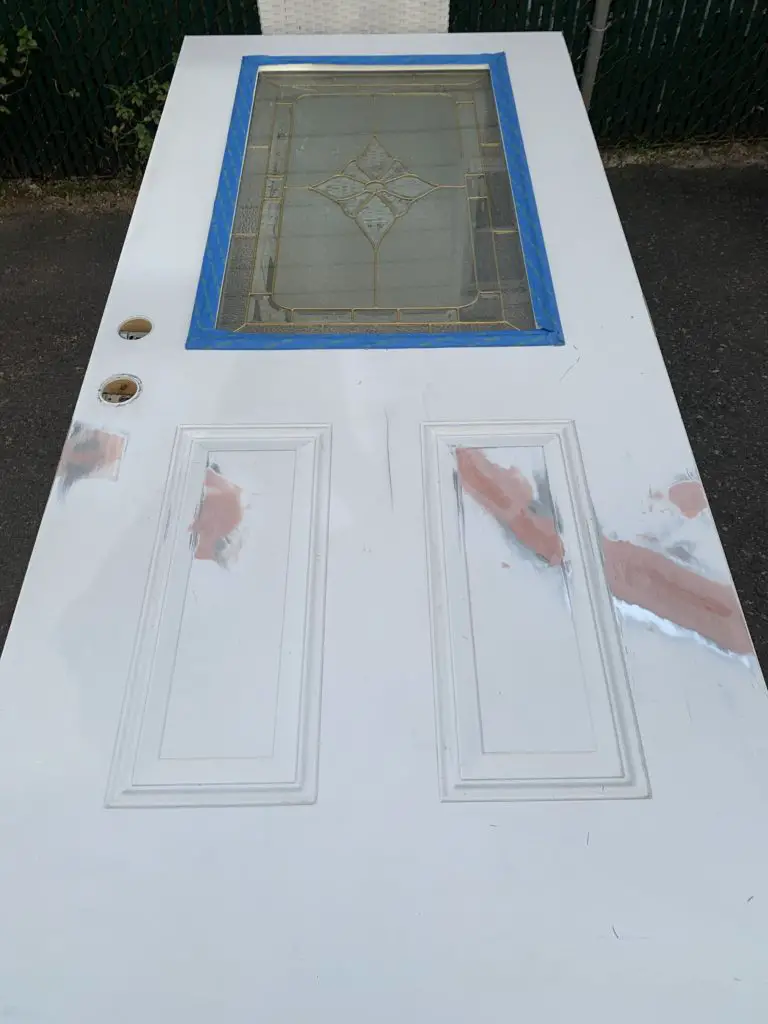
7. Patch again. It took a few layers of putty to get a nice enough finish.

8. Tape out the window (don’t be proud, kids, we’re going dark blue).
9. Paint – this took me three coats of paint. Pictured here is coat #2.
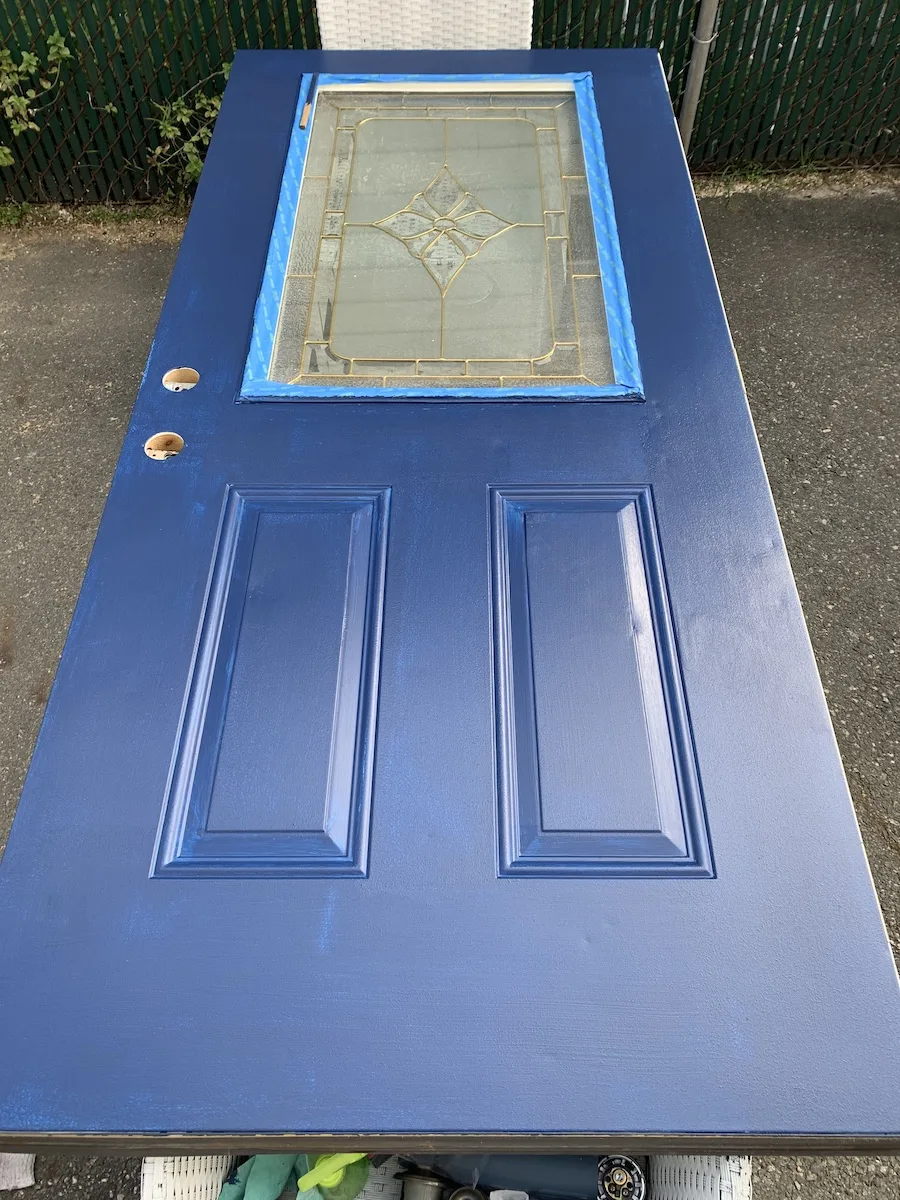
10. BE PATIENT. Let it dry. Like, really, really dry. The last thing I needed was a thumbprint on my fine craftsmanship at the end of the day.
11. Re-hang door and reattach the hardware.
Here’s the full tutorial on How to Repair an Exterior Door.
Finishing Touches
Almost there!
Last step – and my favorite – the pretty stuff!
We bought some mums, being that it was September, installed our flag mount and mailboxes, invested in a cute lil’ pumpkin, and took this “after” picture on the most beautiful day.
Pretty nice, right?
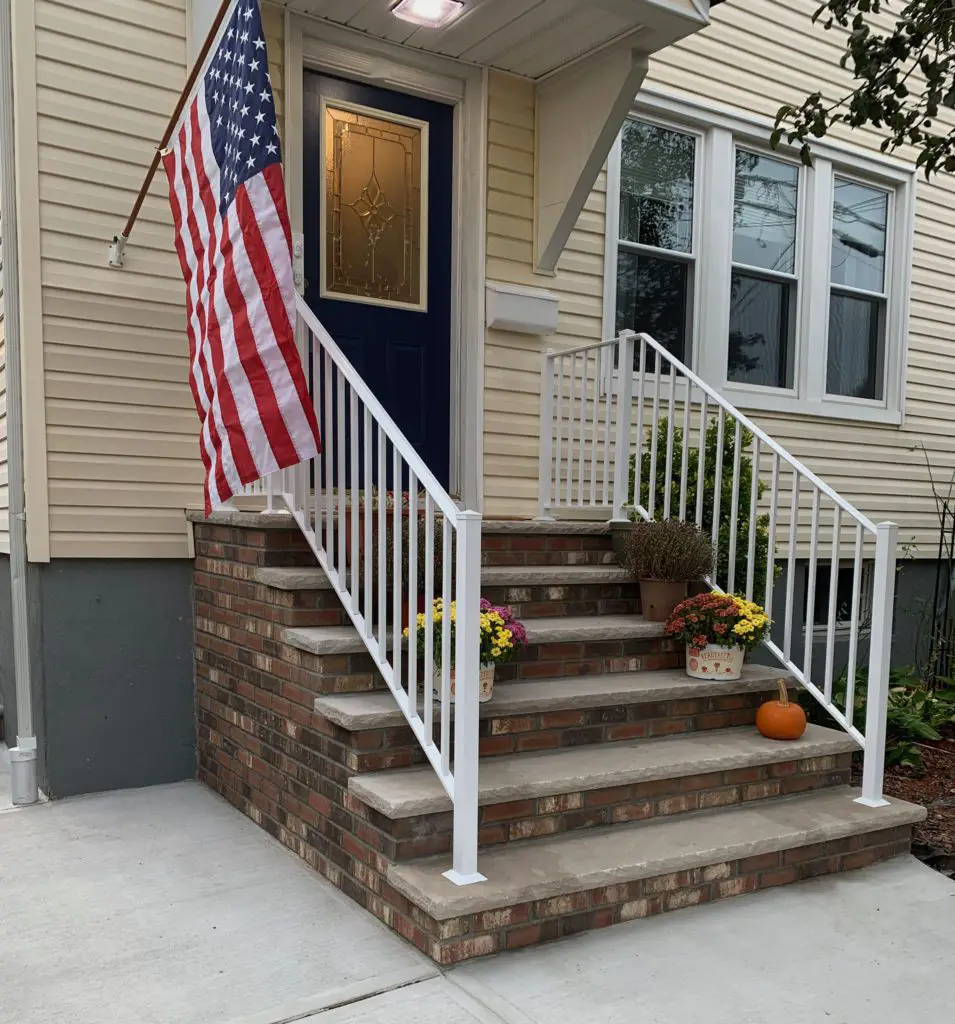
All summed up, this home curb appeal before and after on our house was totally worth it!
Replacing the stairs, repairing the siding, painting the front door, and making it pretty sure has paid off!
What do you think? What else would you have done to boost this curb appeal?