Our Amazing Old House Remodel – The 2nd Floor, Part 4
This post may contain affiliate links. If you purchase a product through one of them, we will receive a commission at no additional cost to you. As Amazon Associates, we earn from qualifying purchases.
Welcome back to our two family house! Today, we present the 4th and final post on our old house remodel. We are thrilled to show you the final step of our 2nd floor rental apartment makeover.
If you’re just catching up, here are the first three posts in this series:
- Part 1: 100 year old house renovation
- Part 2: Impressive old house kitchen renovation
- Part 3: old house bathroom renovation
Today, we’ll share how we corrected the 3rd bedroom, flooring, paint, and an entire staircase.
Let’s go!
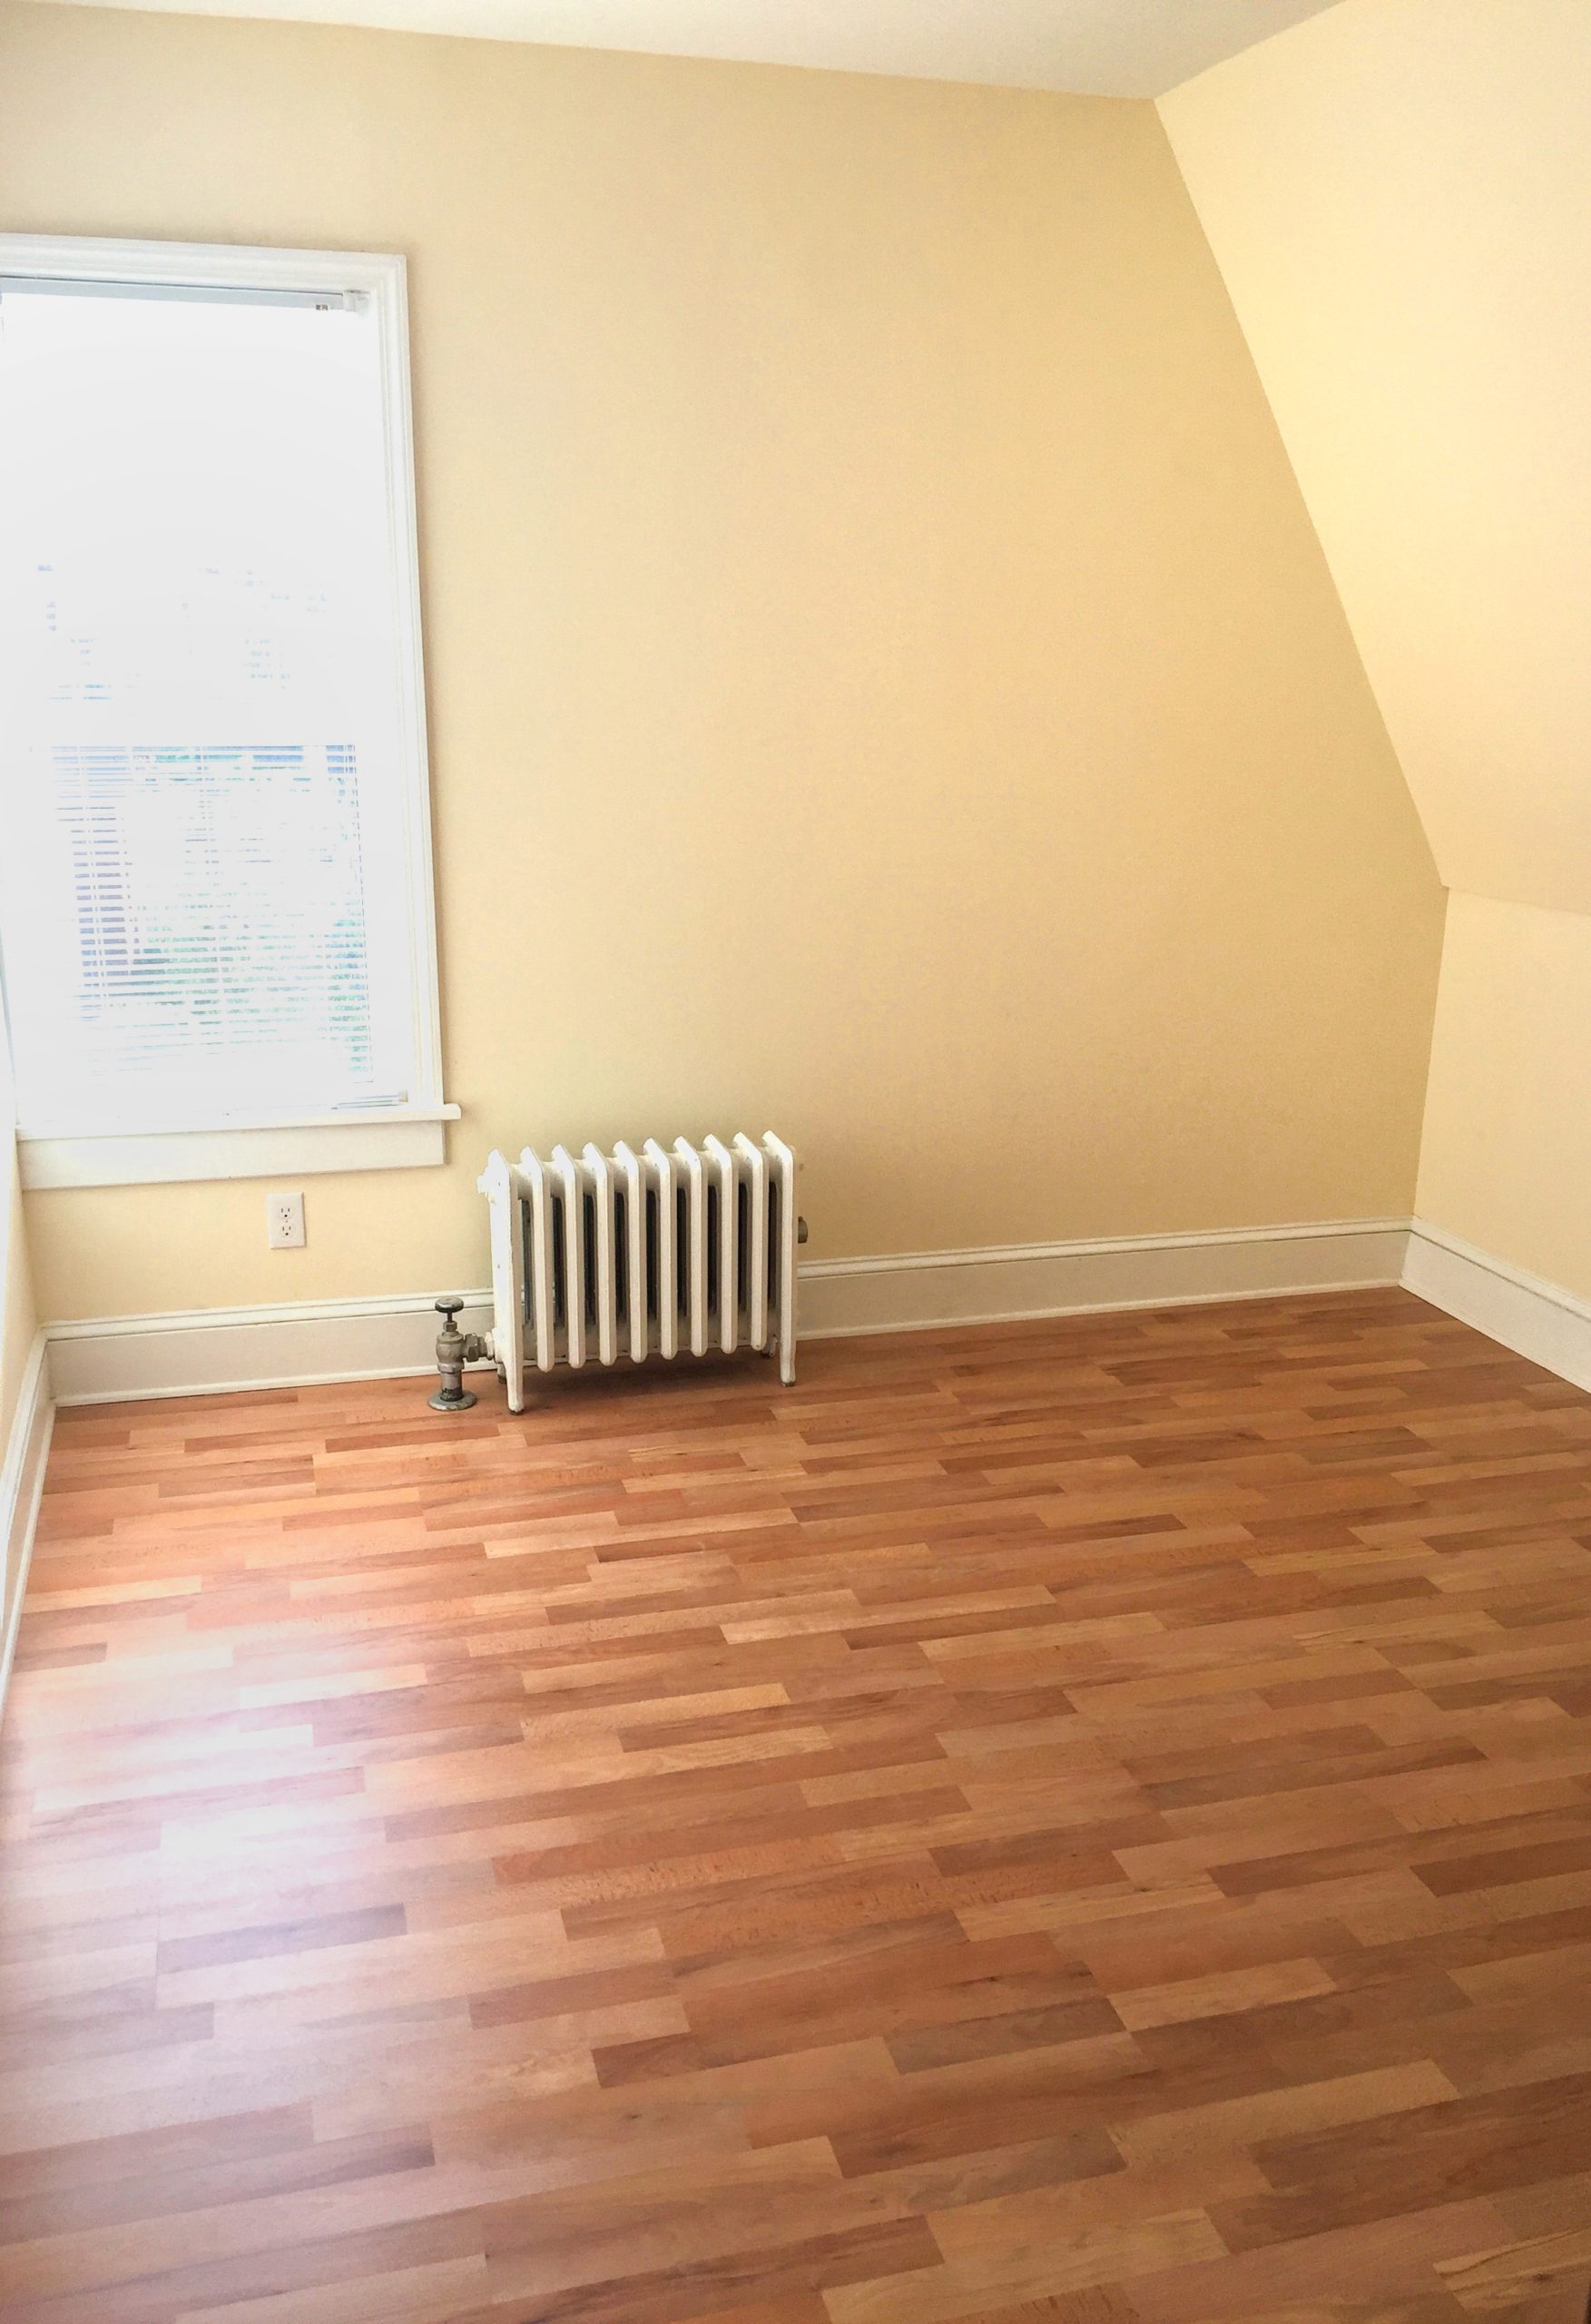
Bedroom 3
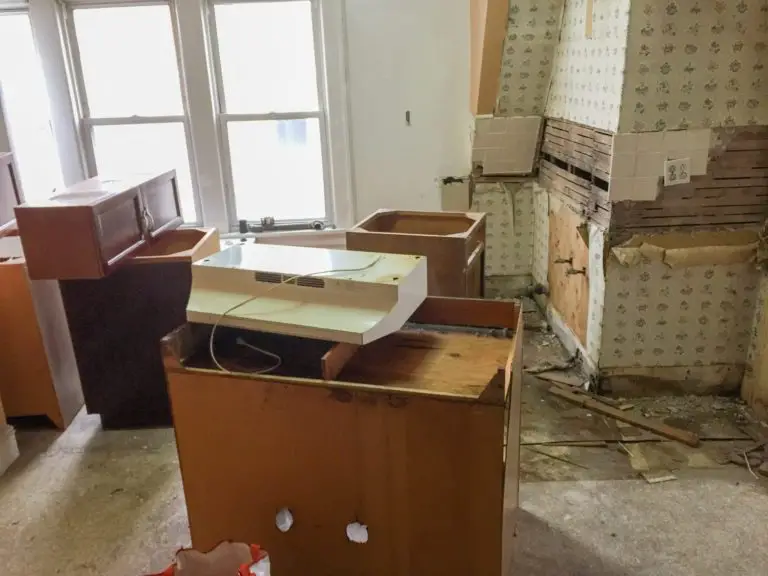
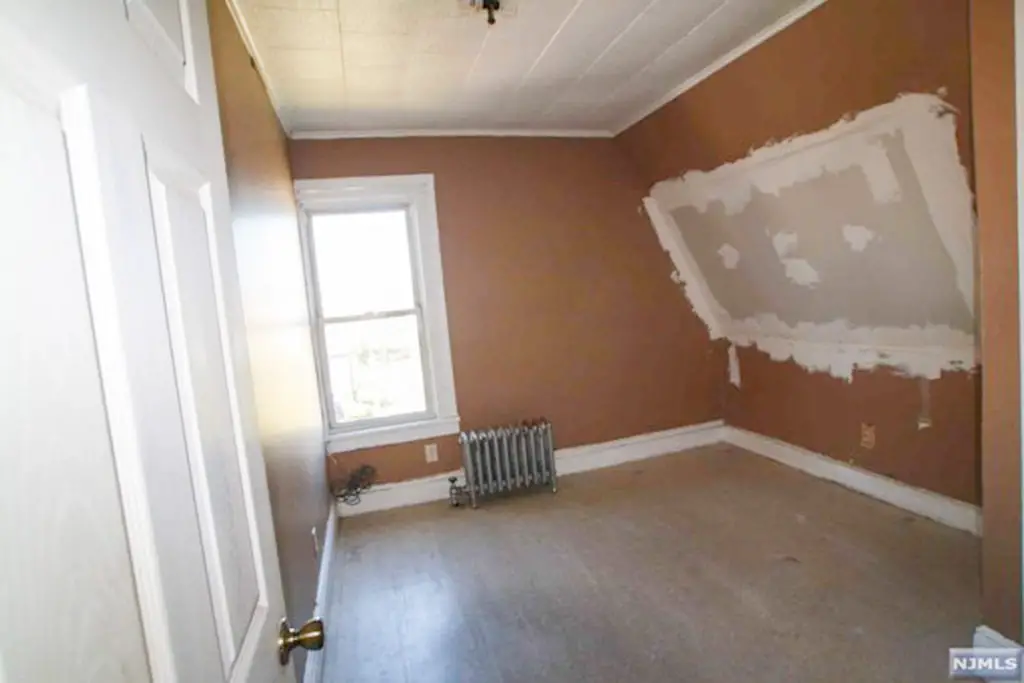
If you recall from part 1 of this series, poor bedroom #3 had fallen victim to a roof leak. Our FHA 203k HUD House sat vacant for two years during its foreclosure. This ceiling absorbed a slow drip for way too long. Sad, right?
After we figured out the source of the problem, we had our roofers correct the outside. There’s no sense in fixing the inside if it’s just going to get soaked again, right?
Then, it was time to gut the room – we felt this was necessary for three reasons:
- Plaster was falling from the walls anyway.
- We were concerned that moisture had lived between the studs for too long (read: mold).
- It had no insulation, save for the sheetrock “fix” you see in the before picture.
It was a straightforward process.
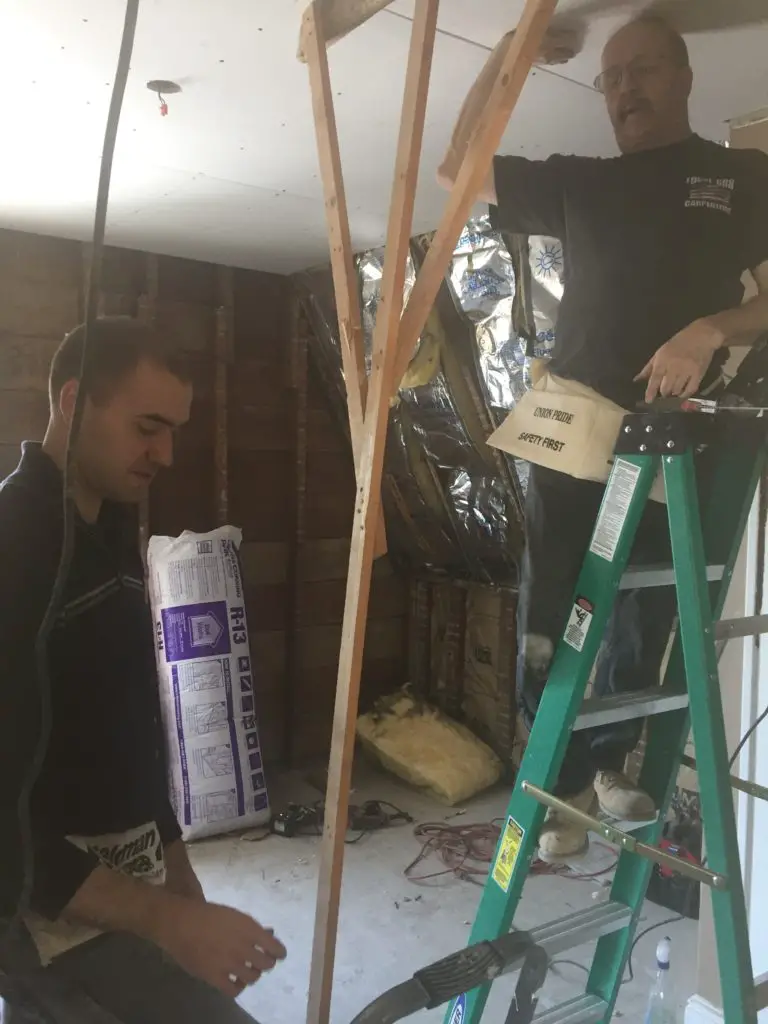
First, demo.
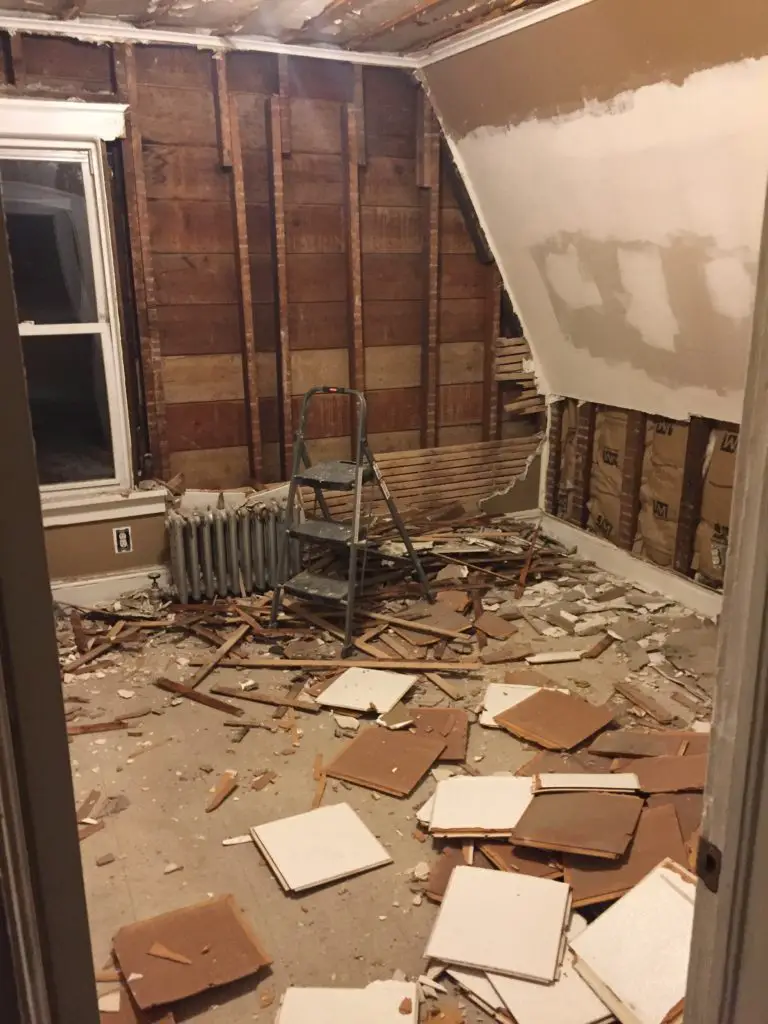
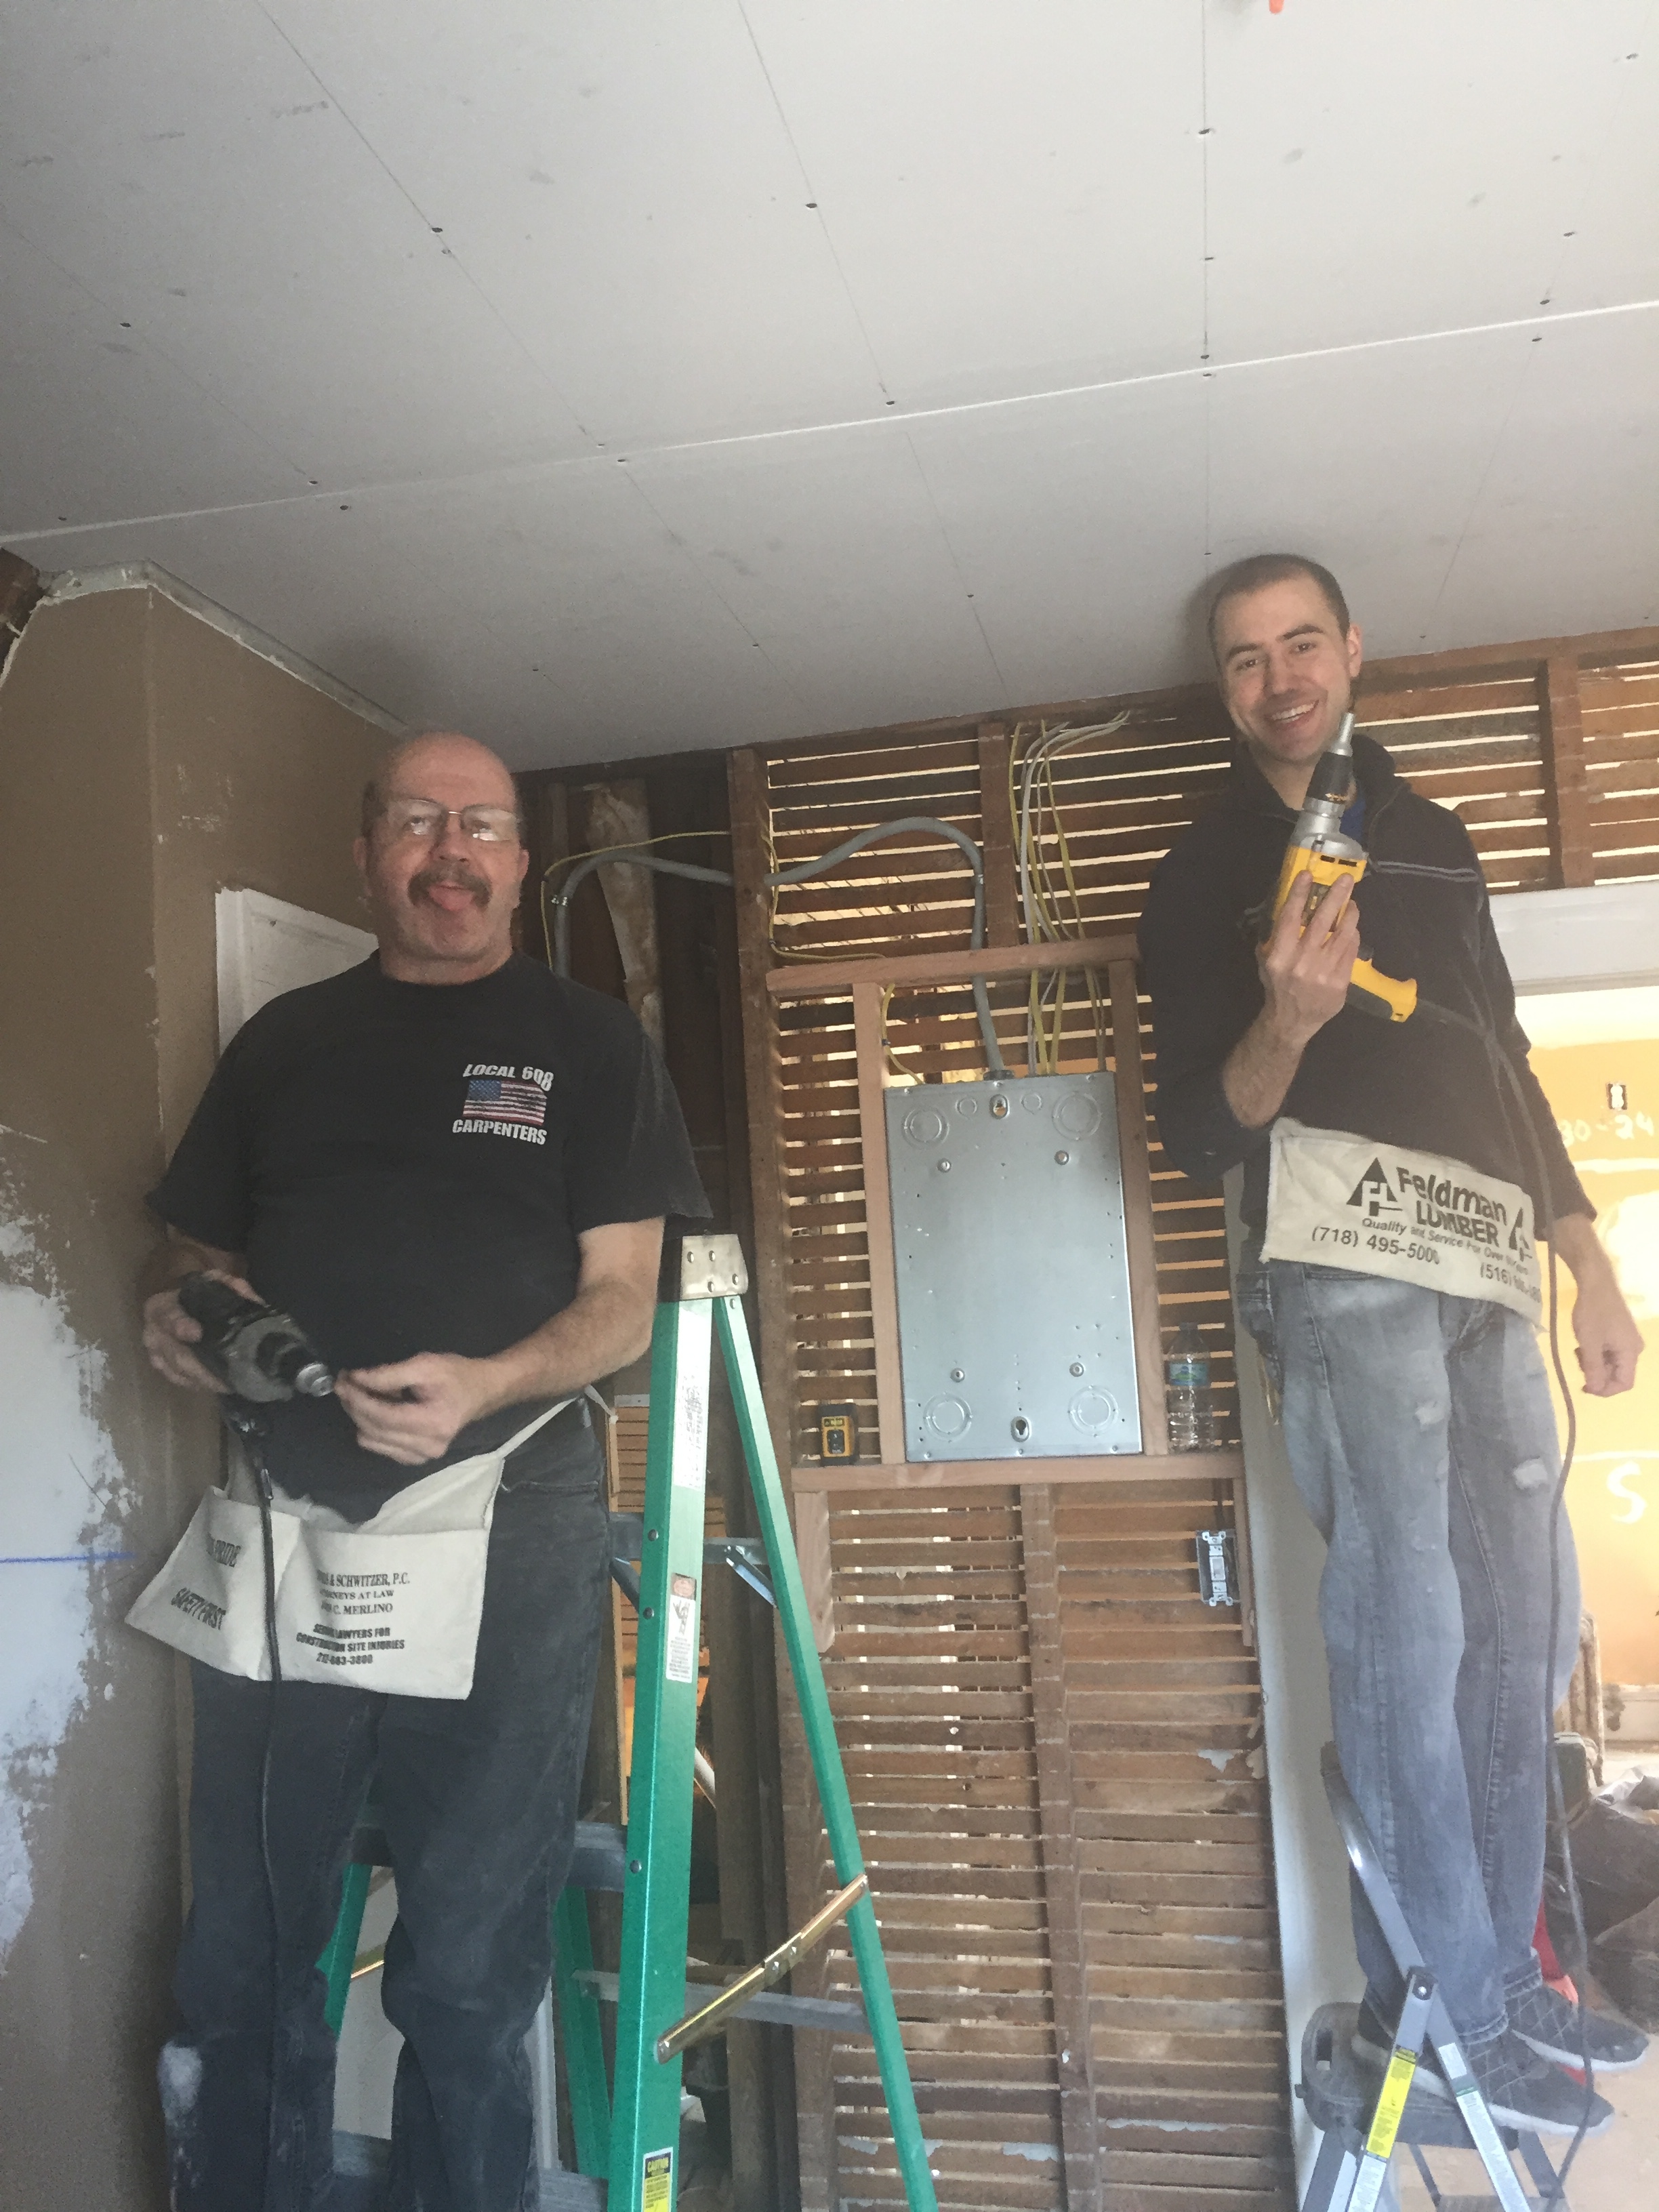
Second, insulation + vapor barrier + sheetrock. Check out my dad’s brilliant brace to hold up the rock for the ceiling. Slick, right?
Following that, we made it nice-nice with tape and paint.
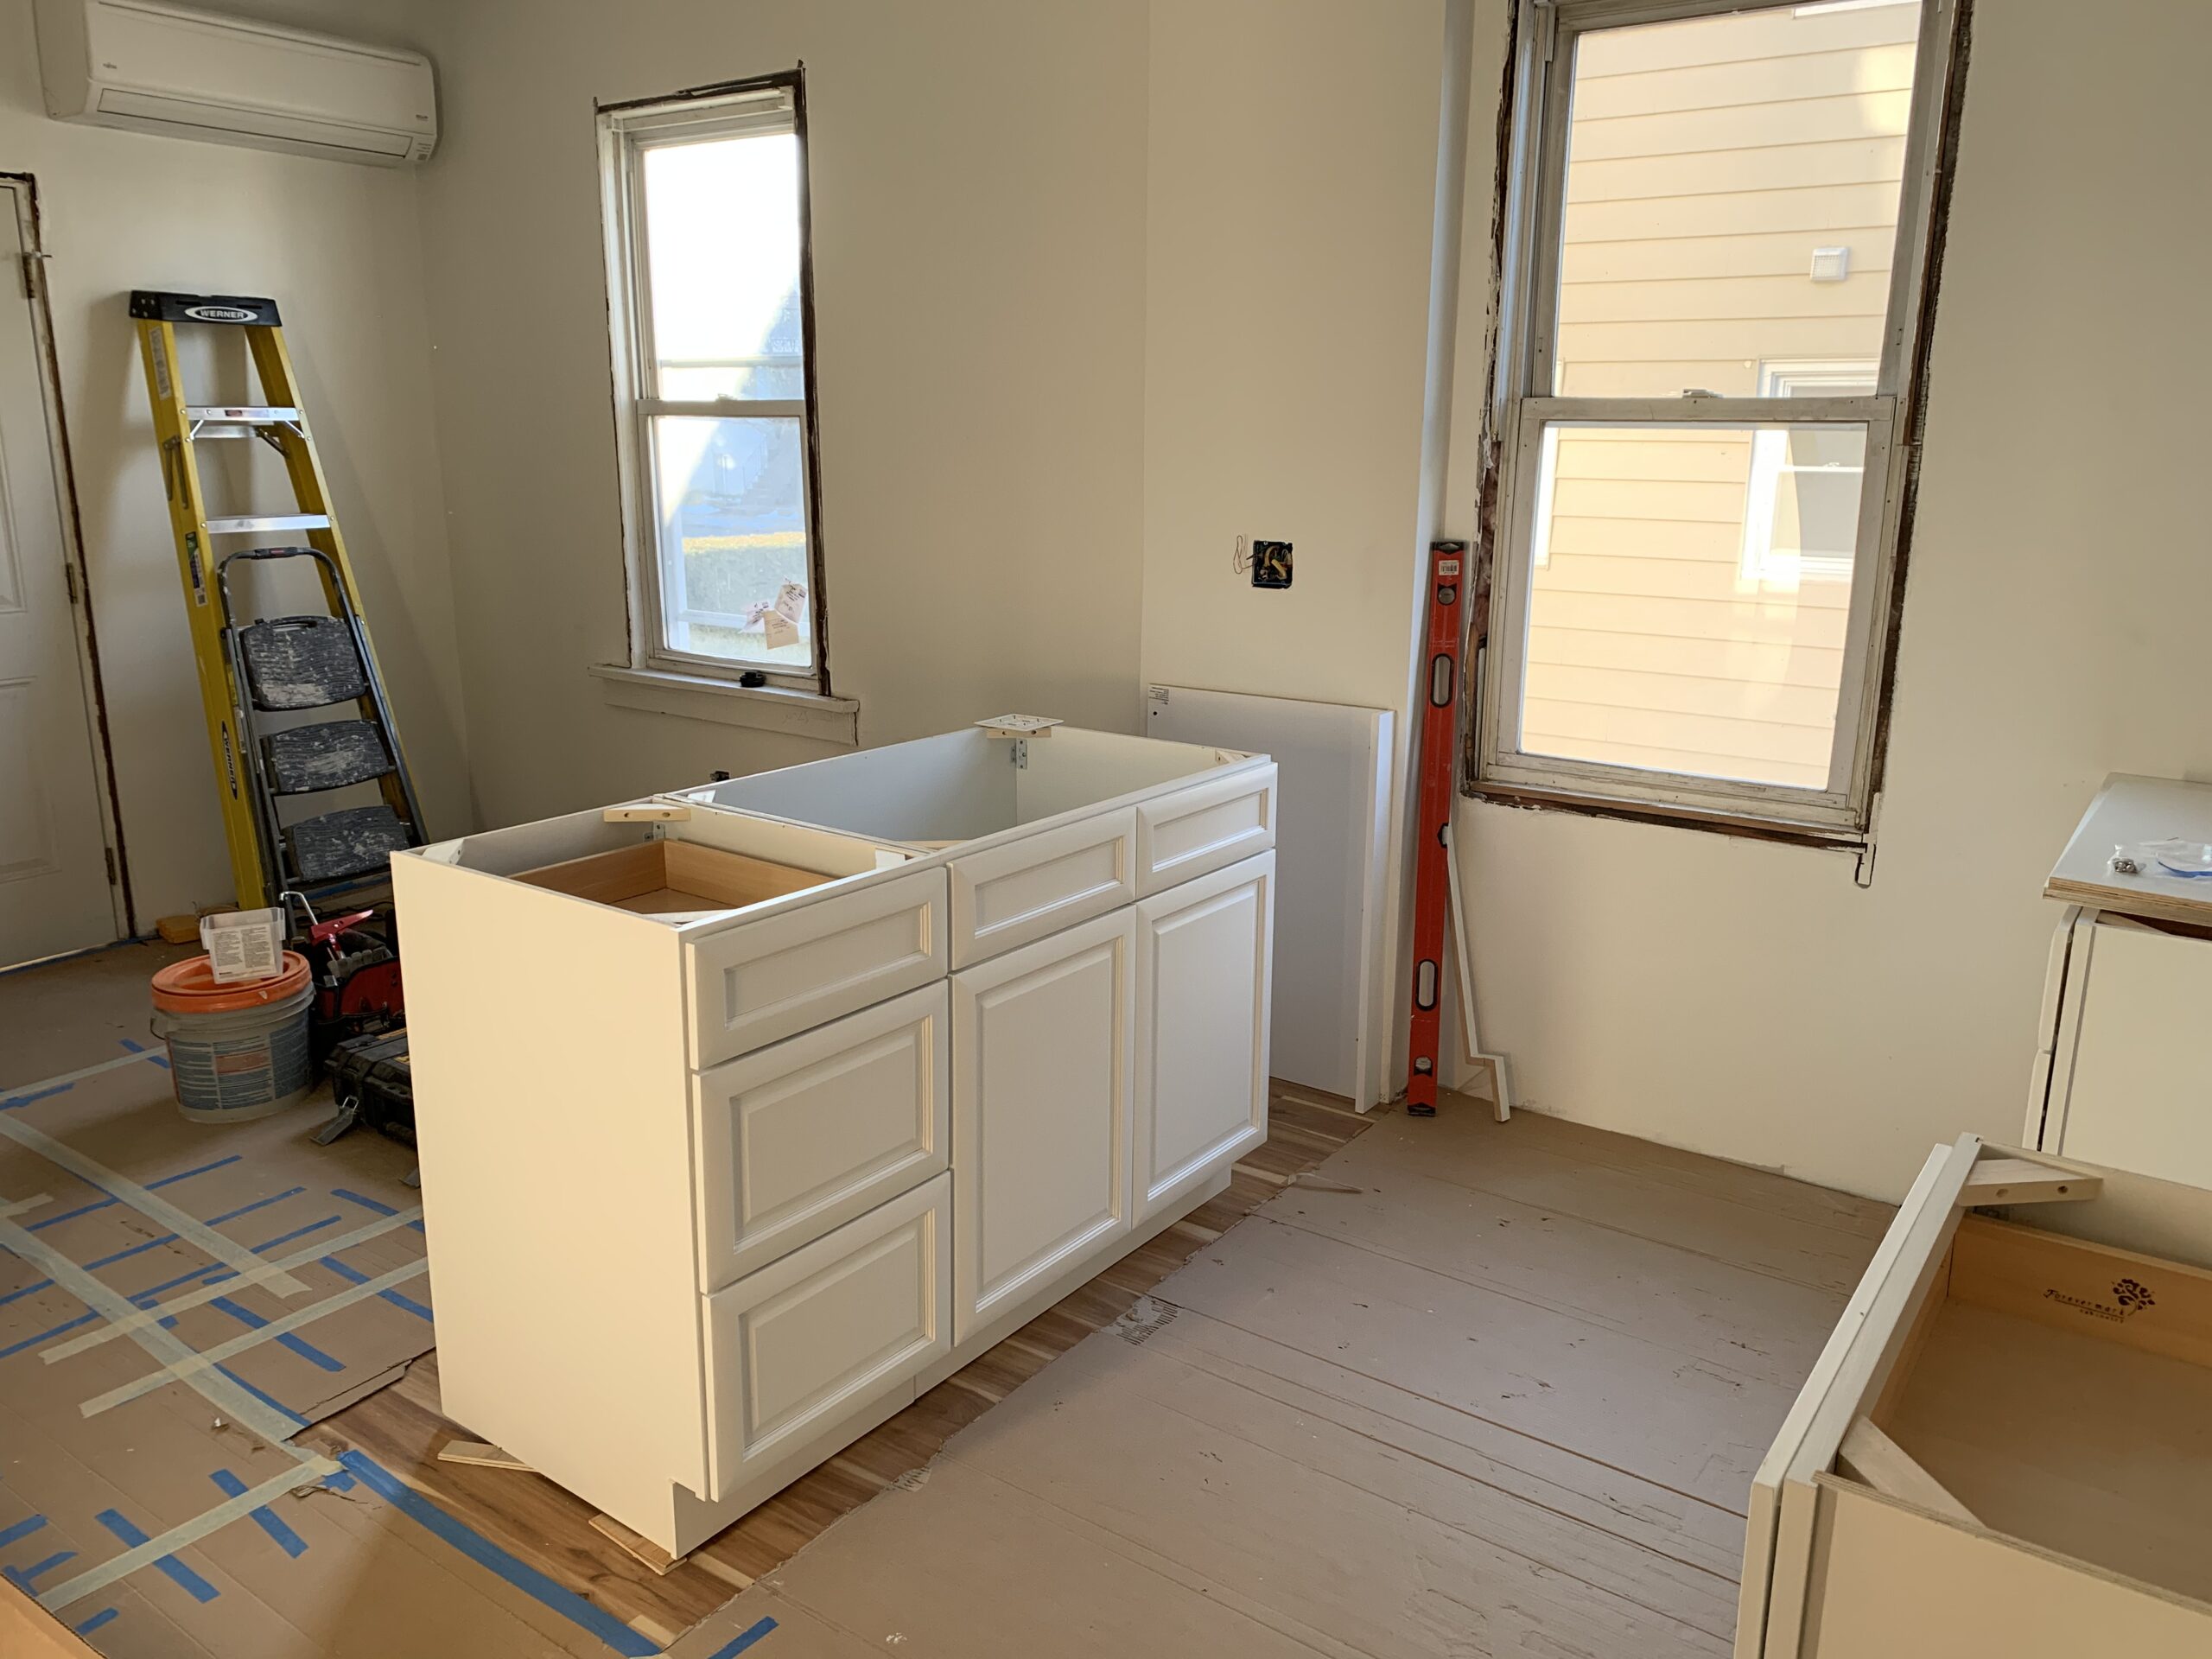
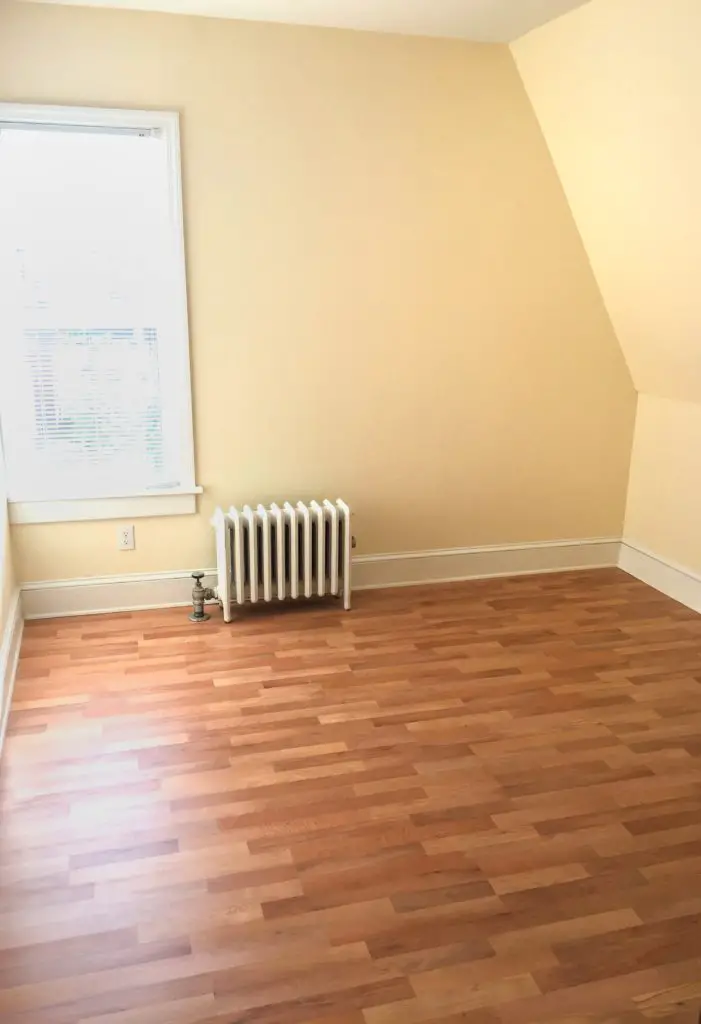
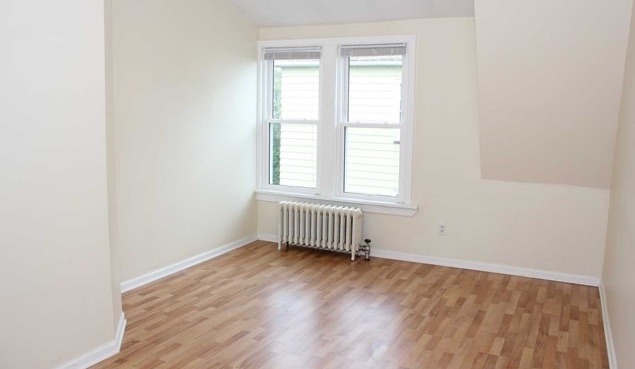
Flooring went next – we used the same laminates throughout the apartment (more on that below).
And, there it is! Bedroom #3, check.
Paint
The entire second floor apartment needed a paint job. Oof.
Instead of a plain white, we chose this creamy neutral color called “Monogramme.” We loved it so much that we wrote down the recipe, lest SW stop carrying it on the shelf.
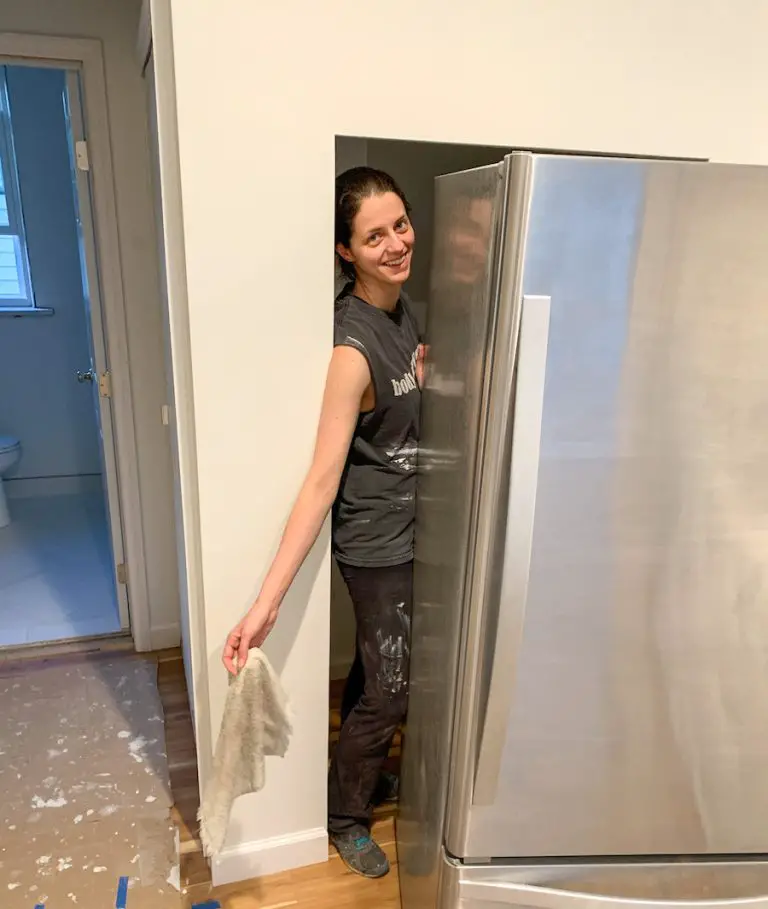
Since we knew we needed help, we called in our fabulous family and friends to come have a painting party with us!
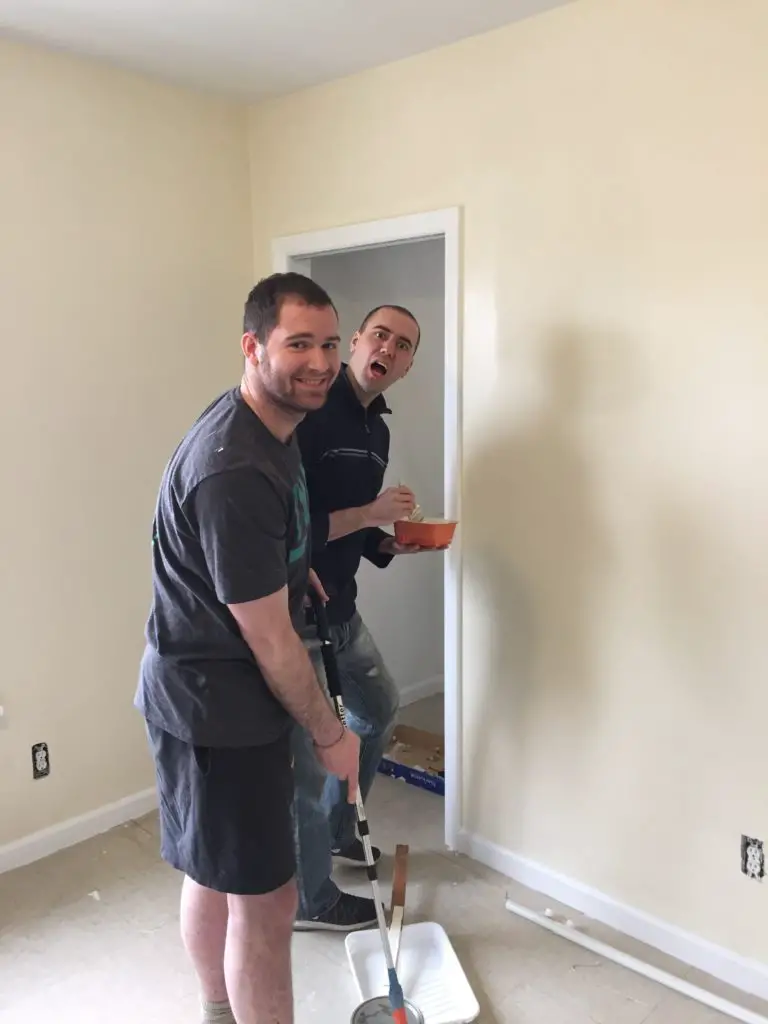


We are so fortunate to have so many people supporting our home ownership journey. Our old house remodel would not have been nearly as fun without these fabulous people in our lives.
If you purchase a house of any sort, we implore you – rely on your tribe!
Flooring
There are many options for flooring in rental apartments – some folks like carpet to minimize noise, others use LVP or laminates for a clean look & water resistance. LVP wasn’t popular in 2017 during our old house remodel, so we chose laminates over carpets to avoid the smells and stains that carpets would attract.
Sure, carpets might absorb more sound, but we much prefer this look, and the footsteps overhead really don’t bother us as owner occupants.
We scored these at the LL “final sale” pile for 69 cents per square foot (amazing!!) and installed them ourselves with the guidance of my incredible father.
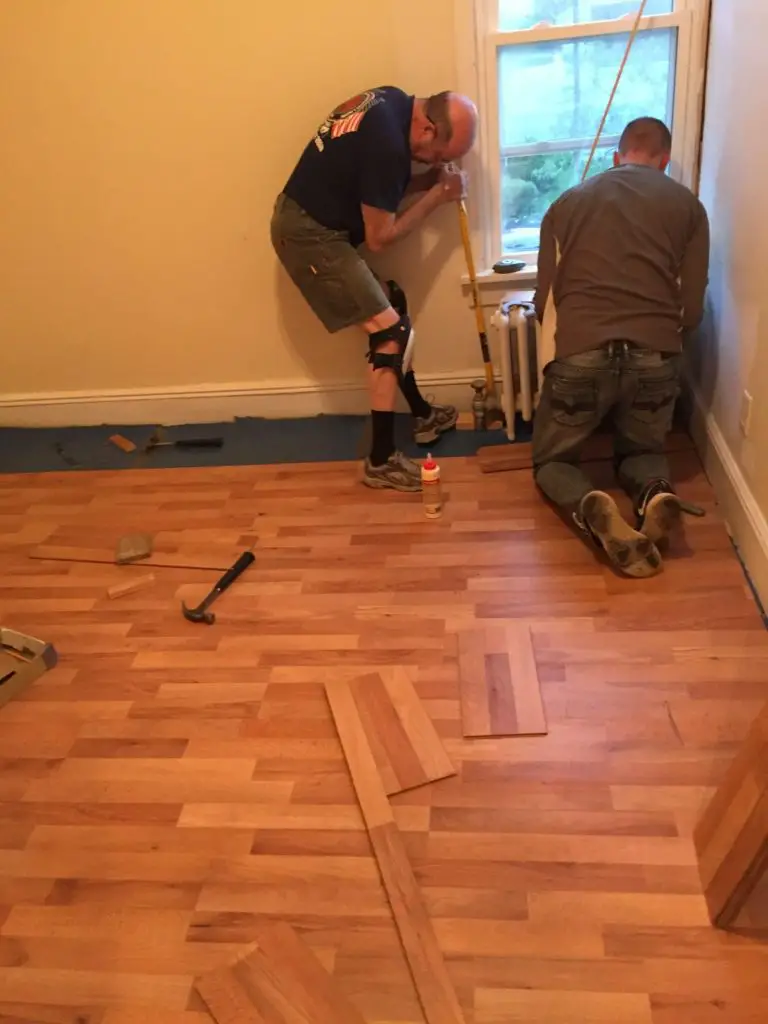
We used a crowbar and block as a lever to get the flooring underneath the cast iron radiators – the hardest part of this flooring install.
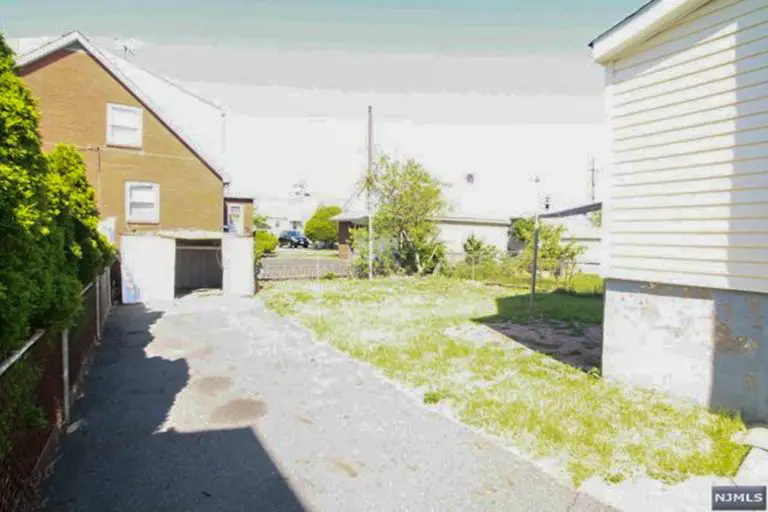
Here’s a peek at the living room, all gussied up with paint and flooring.
Staircase
The Plan
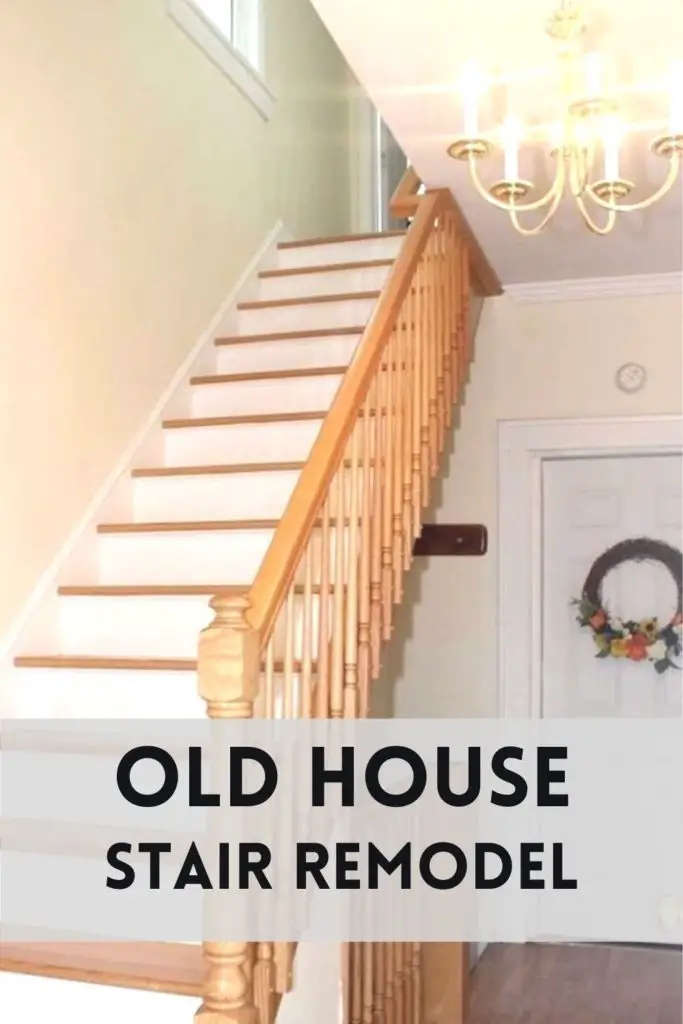
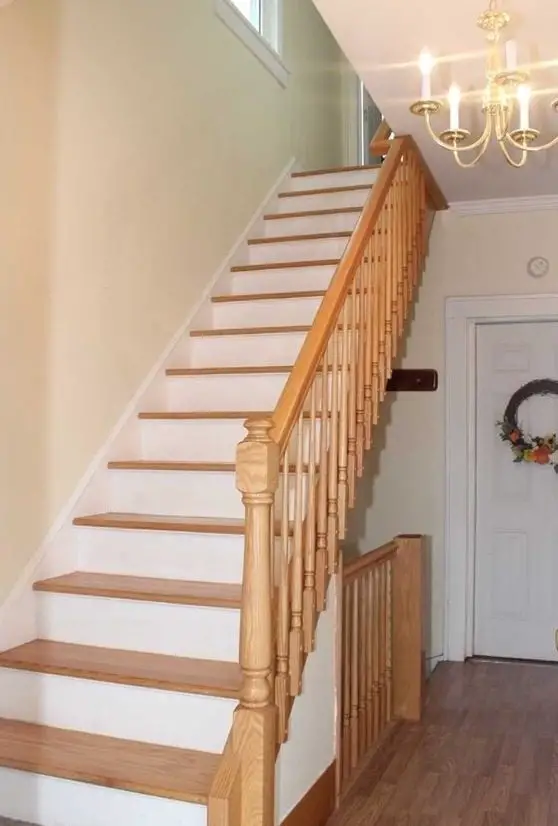
Oh yes. The crown jewel of our old house remodel: the staircase.
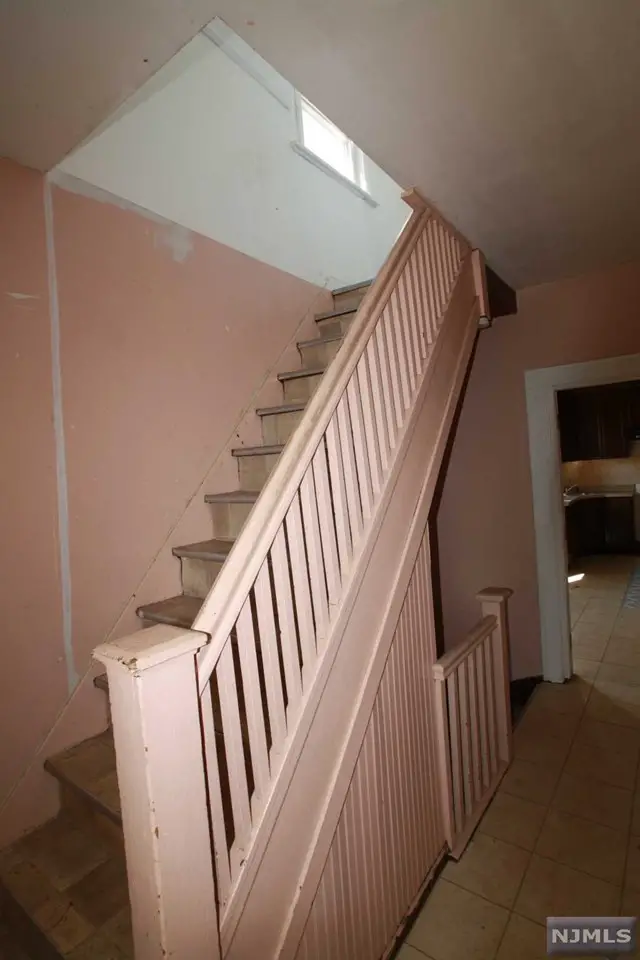
It screams, “welcome home,” am I right? Structure problems, code problems…
Side note – if ever in your life, you meet the person that splashed this vomit-pink paint on every inch of this staircase, hallway, balusters, trim… send them my way. I have some words to share with them.
Anyway, we knew this was a huge problem staring us down before we’d ever confidently rent out our second floor.
As we mentioned in part 1 of this series – we couldn’t even get a queen bed up the stairs amid the steep incline and low ceiling.
The other problem was the steps were too steep for walking – technically no longer up to code.
The general plan to correct these issues: make more steps, and make them less steep. We had space to work with at the top platform, and could afford to make it a longer stair on a less severe incline.
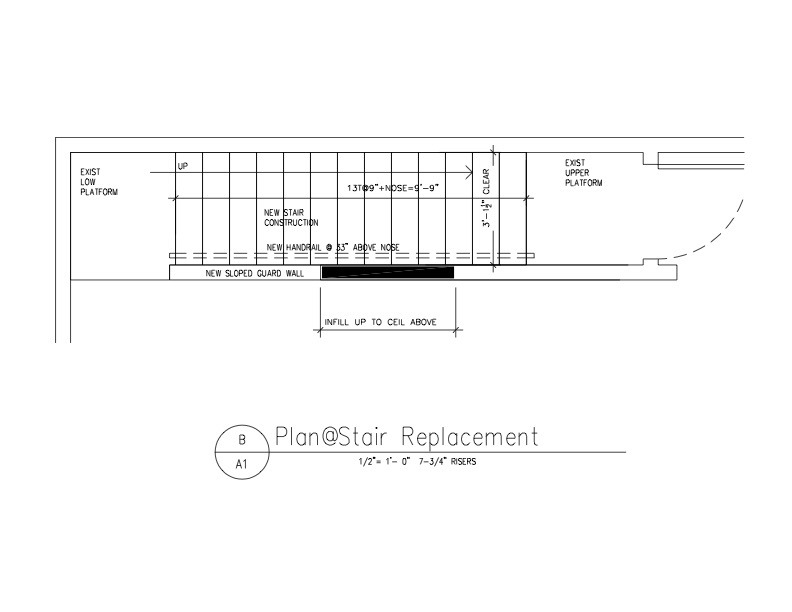
With careful planning and a lot of help, my courageous father decided we could install this staircase ourselves.
NOTE: DO NOT, under any circumstances, attempt a staircase replacement without a seasoned professional. My father had 40 years of construction experience under his toolbelt before suggesting we do this ourselves. My father-in-law had 40 years of architect experience before helping us calculate what we needed.
…in other words, unless you’ve done this before, don’t try this at home.
Staircase Day!
Let me tell a funny story about staircase installation day.
We chose the second Saturday in April.
It just so happened that I was helping host a bridal shower that day, as a bridesmaid for one of my very best friends. No problem, we decided – I’d just assist the guys in the morning, set up a sweet coffee break and lunch, and then head to the bridal shower in the afternoon.
Naturally, both bridal showers and staircase replacements need a prep day.
So, on the Friday night, Derek, Dad, and Dad’s bestie Frankie got things in order with “prep work.”
The plan was to rip out the old stair first thing on Saturday morning, then spend the afternoon installing the new one.
Friday night, off I go to set up streamers and table settings, and return an hour later to find this:
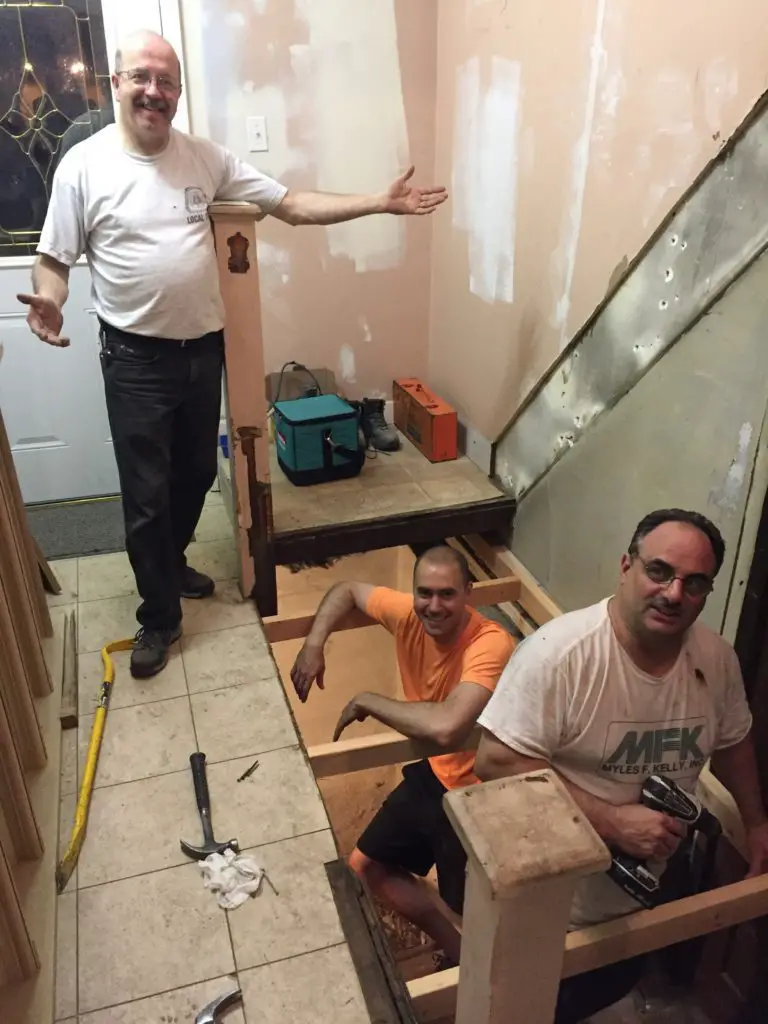
These three goofballs were happy as pigs in muck, beyond delighted at their collective enthusiasm to just “take down the staircase tonight.”
Well, what can I say? Sure enough, the next day, we had a staircase in place before noon.
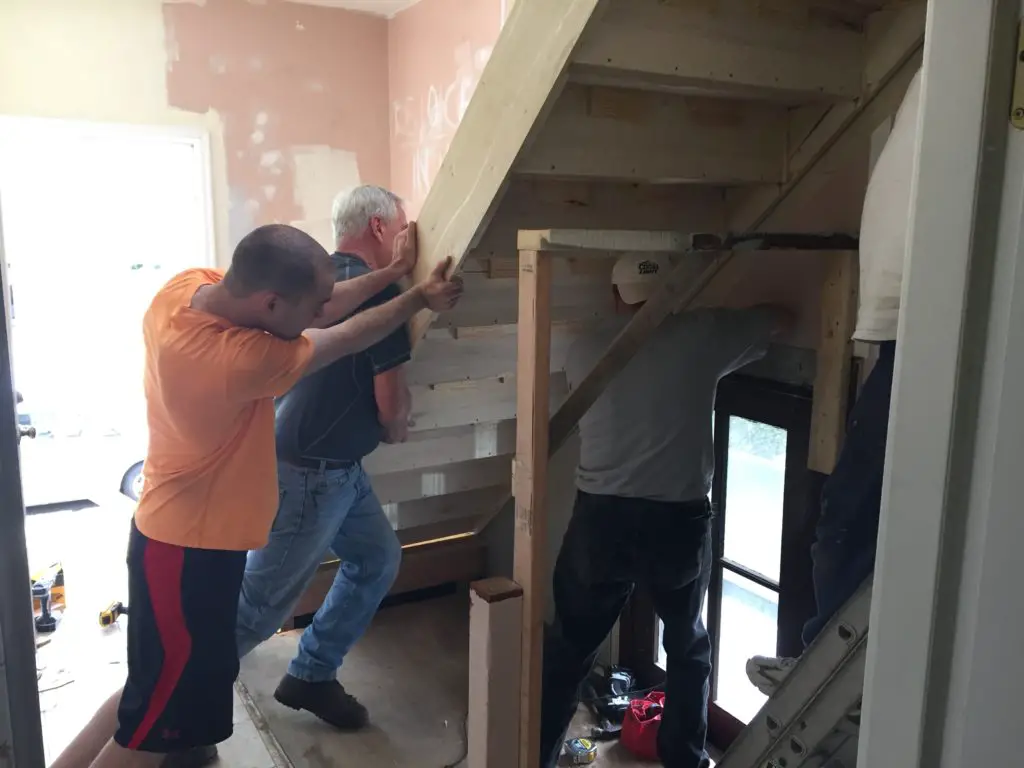
Three cheers for my dad and his buddies for lifting that ridiculously heavy staircase into place.
Oh, and don’t worry, the bridal shower went great, three-tiered bride cake and all.
Finishing Touches
Following the giant staircase install, our hallway just needed the finishing touches.
We scored the chandelier you see in the hallway for a sweet $20 at Habitat Restore.
Flooring replacement was more laminates, less than a dollar per square foot.
Dad casually tossed some crown moulding and chair rail in the hallway for us, for a little extra pizzaz. (Yes, he thinks crown install is fun, and were it an Olympic event contested by speed, he’d triumph, hands down.).
A little wreath, a little coat hook, and there she is.
Sometimes a house just needs a little love.
Before and After
Let’s take a final tour of our old house remodel.
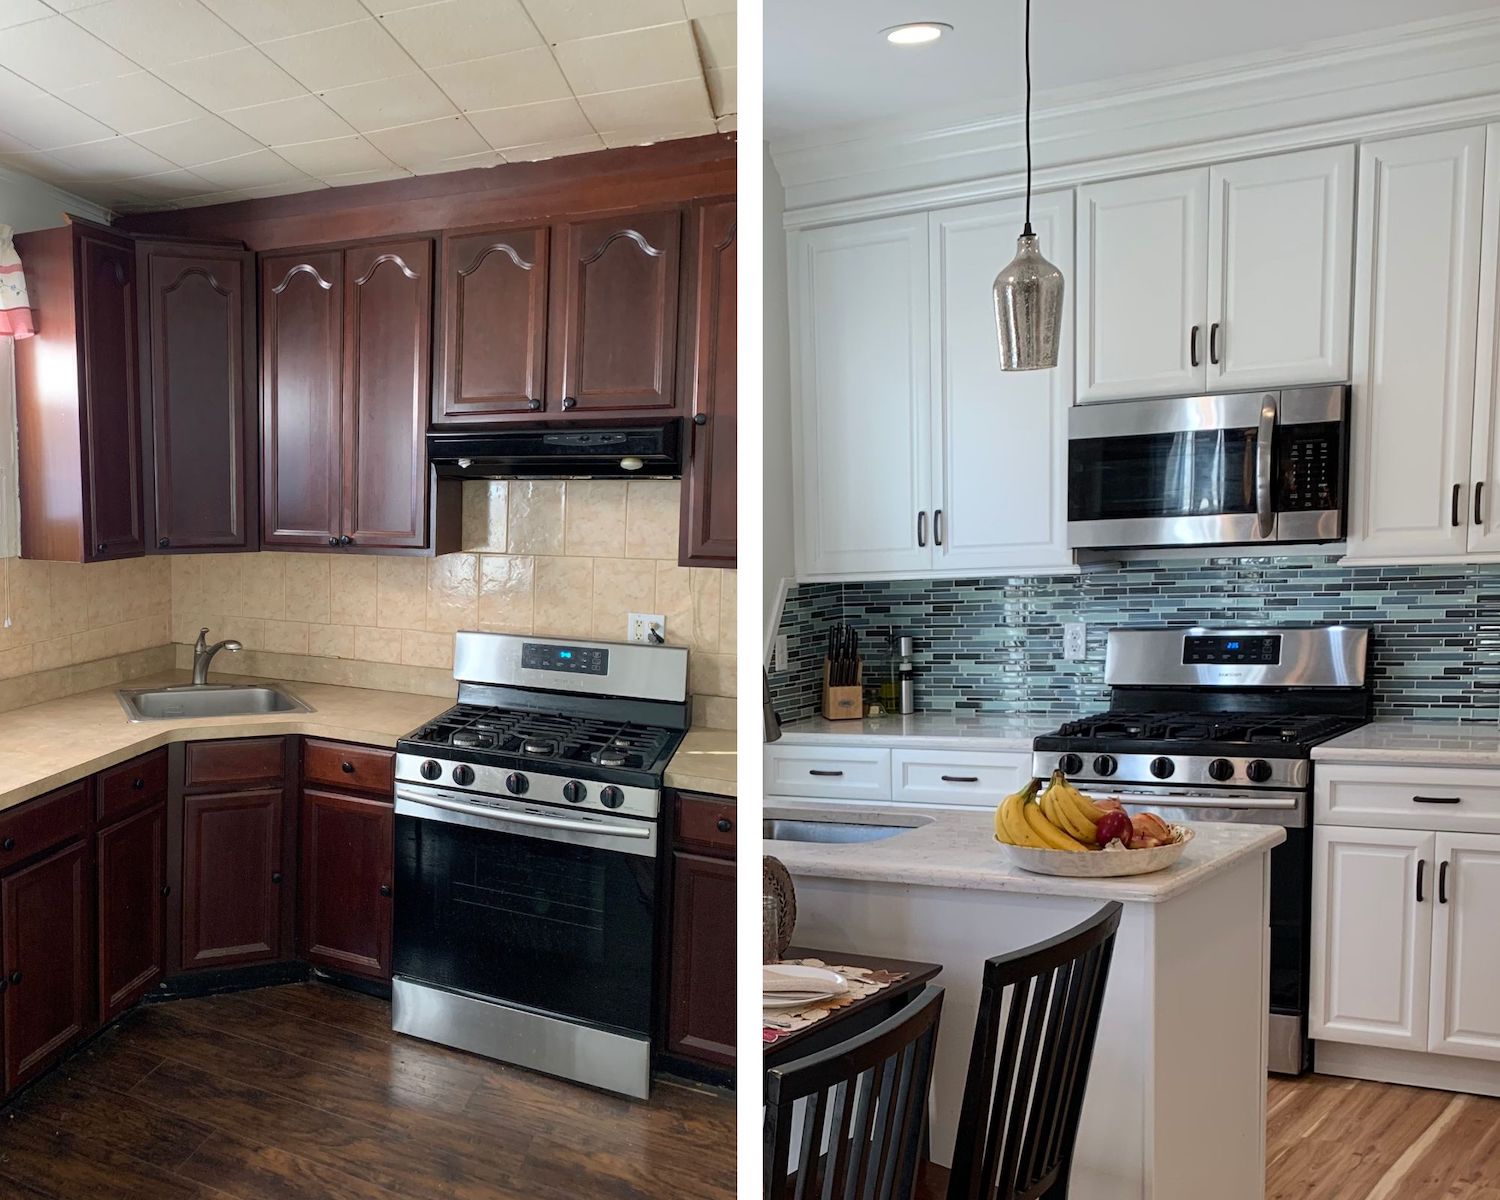
The Kitchen

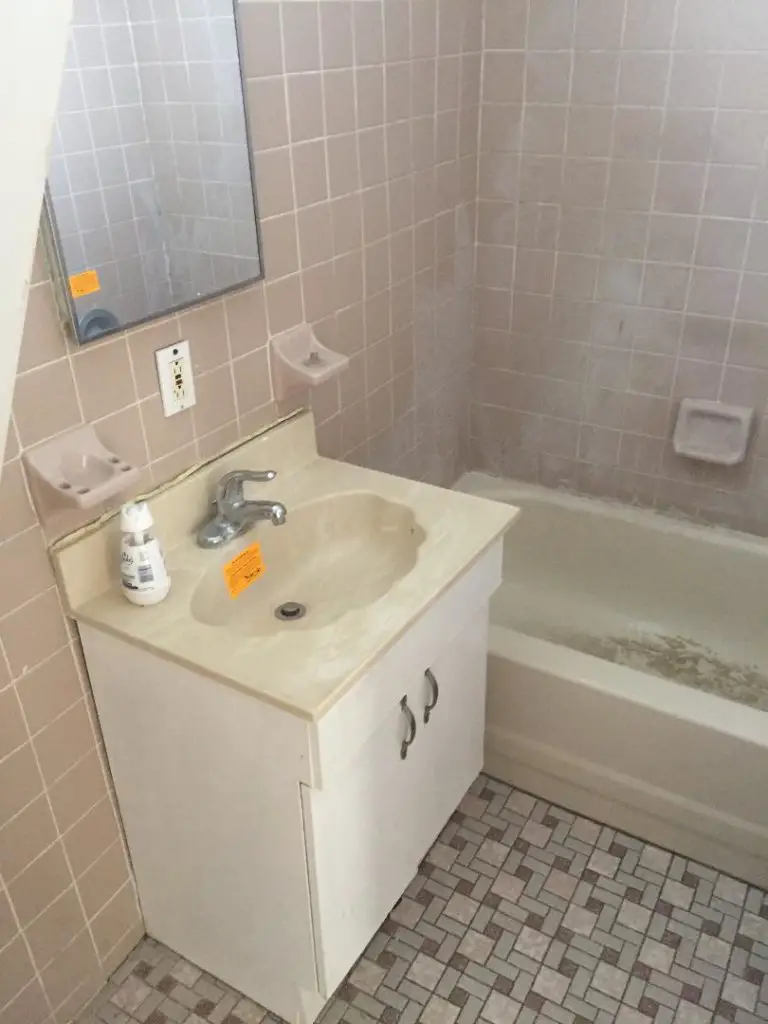
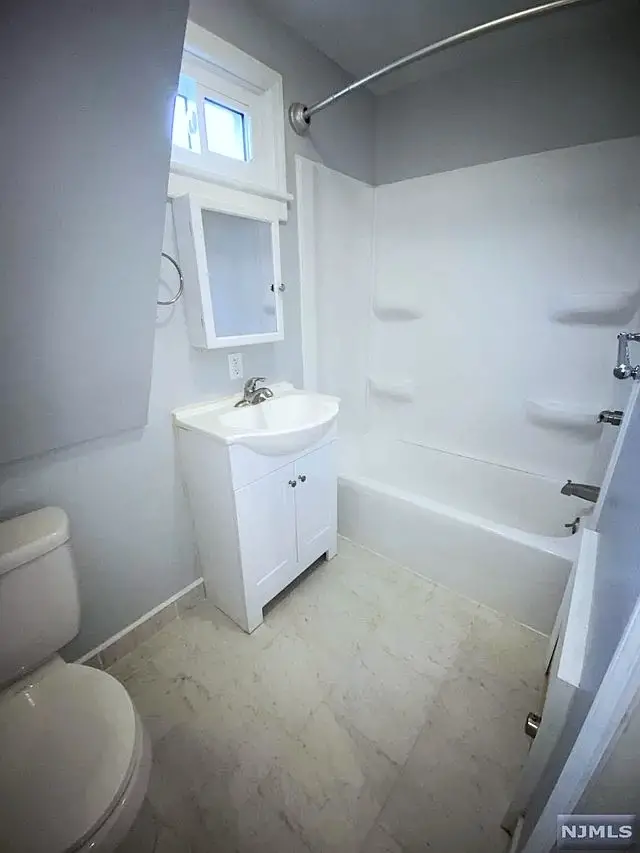
The Bathroom
The Bedrooms

The Staircase
Final Thoughts on Our Old House Remodel
WHEW. Thanks for joining us on the journey through our old house remodel.
We look back in awe that we were crazy enough to take this house on, and in wonder that we had so many people supporting and helping us.
Our rental was ready for tenants! Our dream of house hacking our primary residence was underway!!