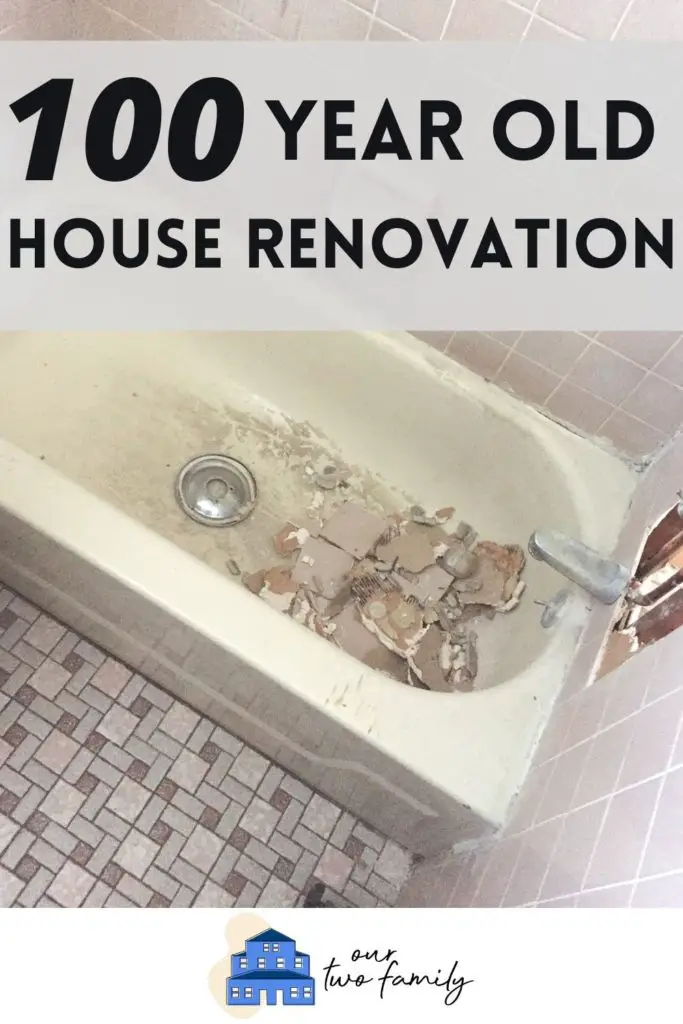
100 Year Old House Renovation – The 2nd Floor, Part 1
This post may contain affiliate links. If you purchase a product through one of them, we will receive a commission at no additional cost to you. As Amazon Associates, we earn from qualifying purchases.
It’s time for another project! Today we are exploring the 2nd floor of our 100 year old house renovation.
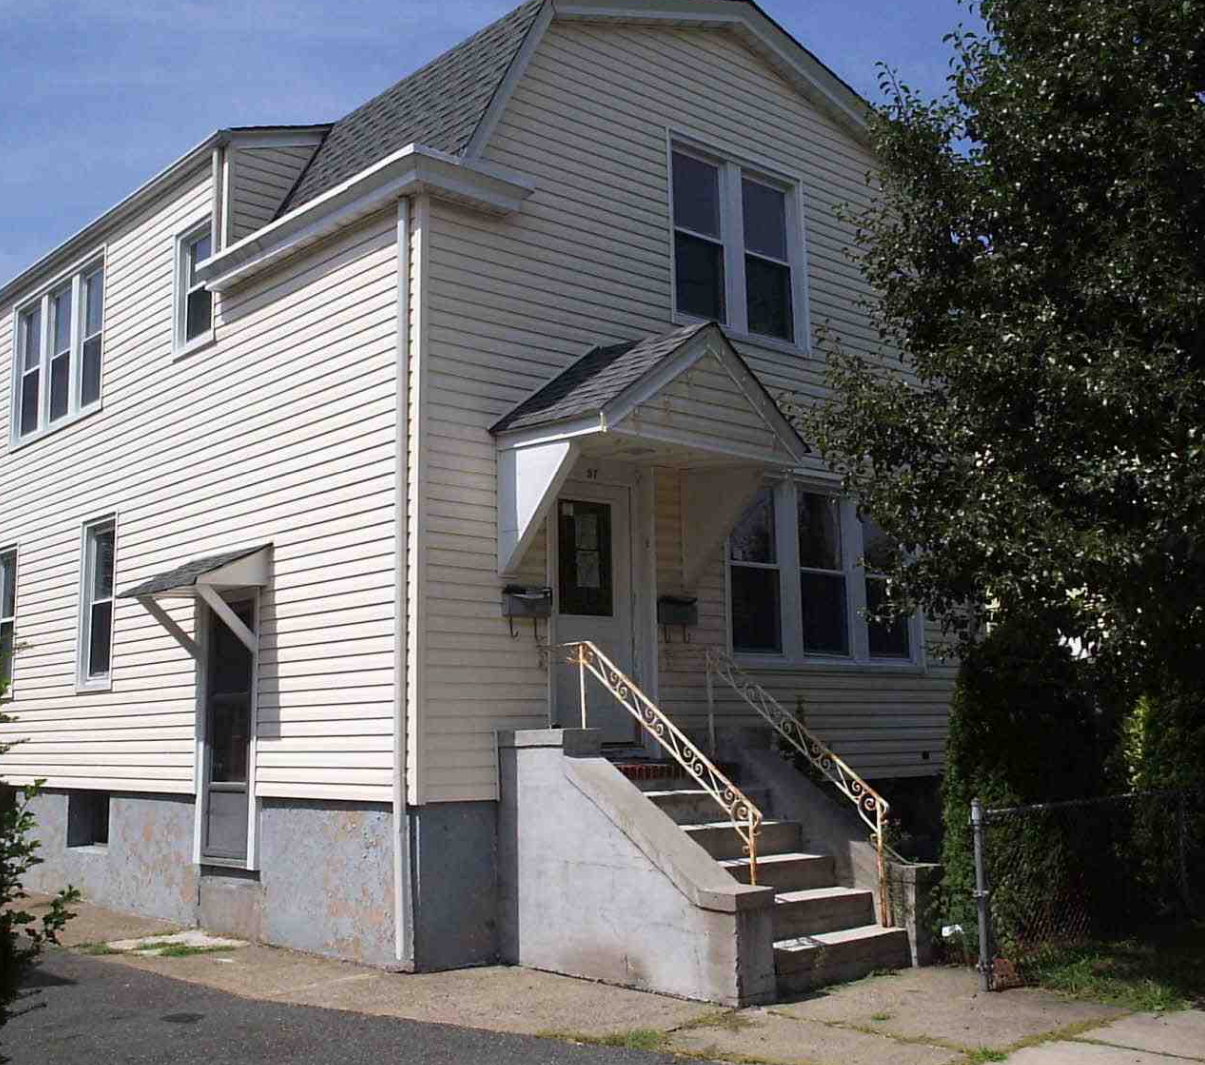
Our two family house was built in 1912 – party like the Titanic hasn’t sunk yet! – and had a plethora of fixes begging for attention when we bought it in 2016.
Come, marvel with me at just how bad an old house can look post-foreclosure, lying vacant, tossed around like Cinderella pre-ballgown-and-fairy-godmother.

Just…. so rough.
As you might know, we decided to buy a two family house to alleviate some of our costs of living. We didn’t know at the time if house hacking would be worth it – but we were certainly ready to give it a go.
Now, could we have left the apartment the way it was and still gotten a renter?
Yes. That was possible.
But… what kind of renter would that apartment have attracted?
We wanted a nice-nice renter, so we needed to provide a nice-nice apartment.
That’s the backstory.
After licking our wounds at the realization that we paid real money for this thing, we asked ourselves the important question:
What do we need to do rent this out?
We came up with five main fixes for our 100 year old house renovation:
- Bedroom #3
- Kitchen
- Bathroom
- Staircase (…ugh.)
- Cosmetics: paint, flooring, windows
Shortly after Christmas 2016, we began.
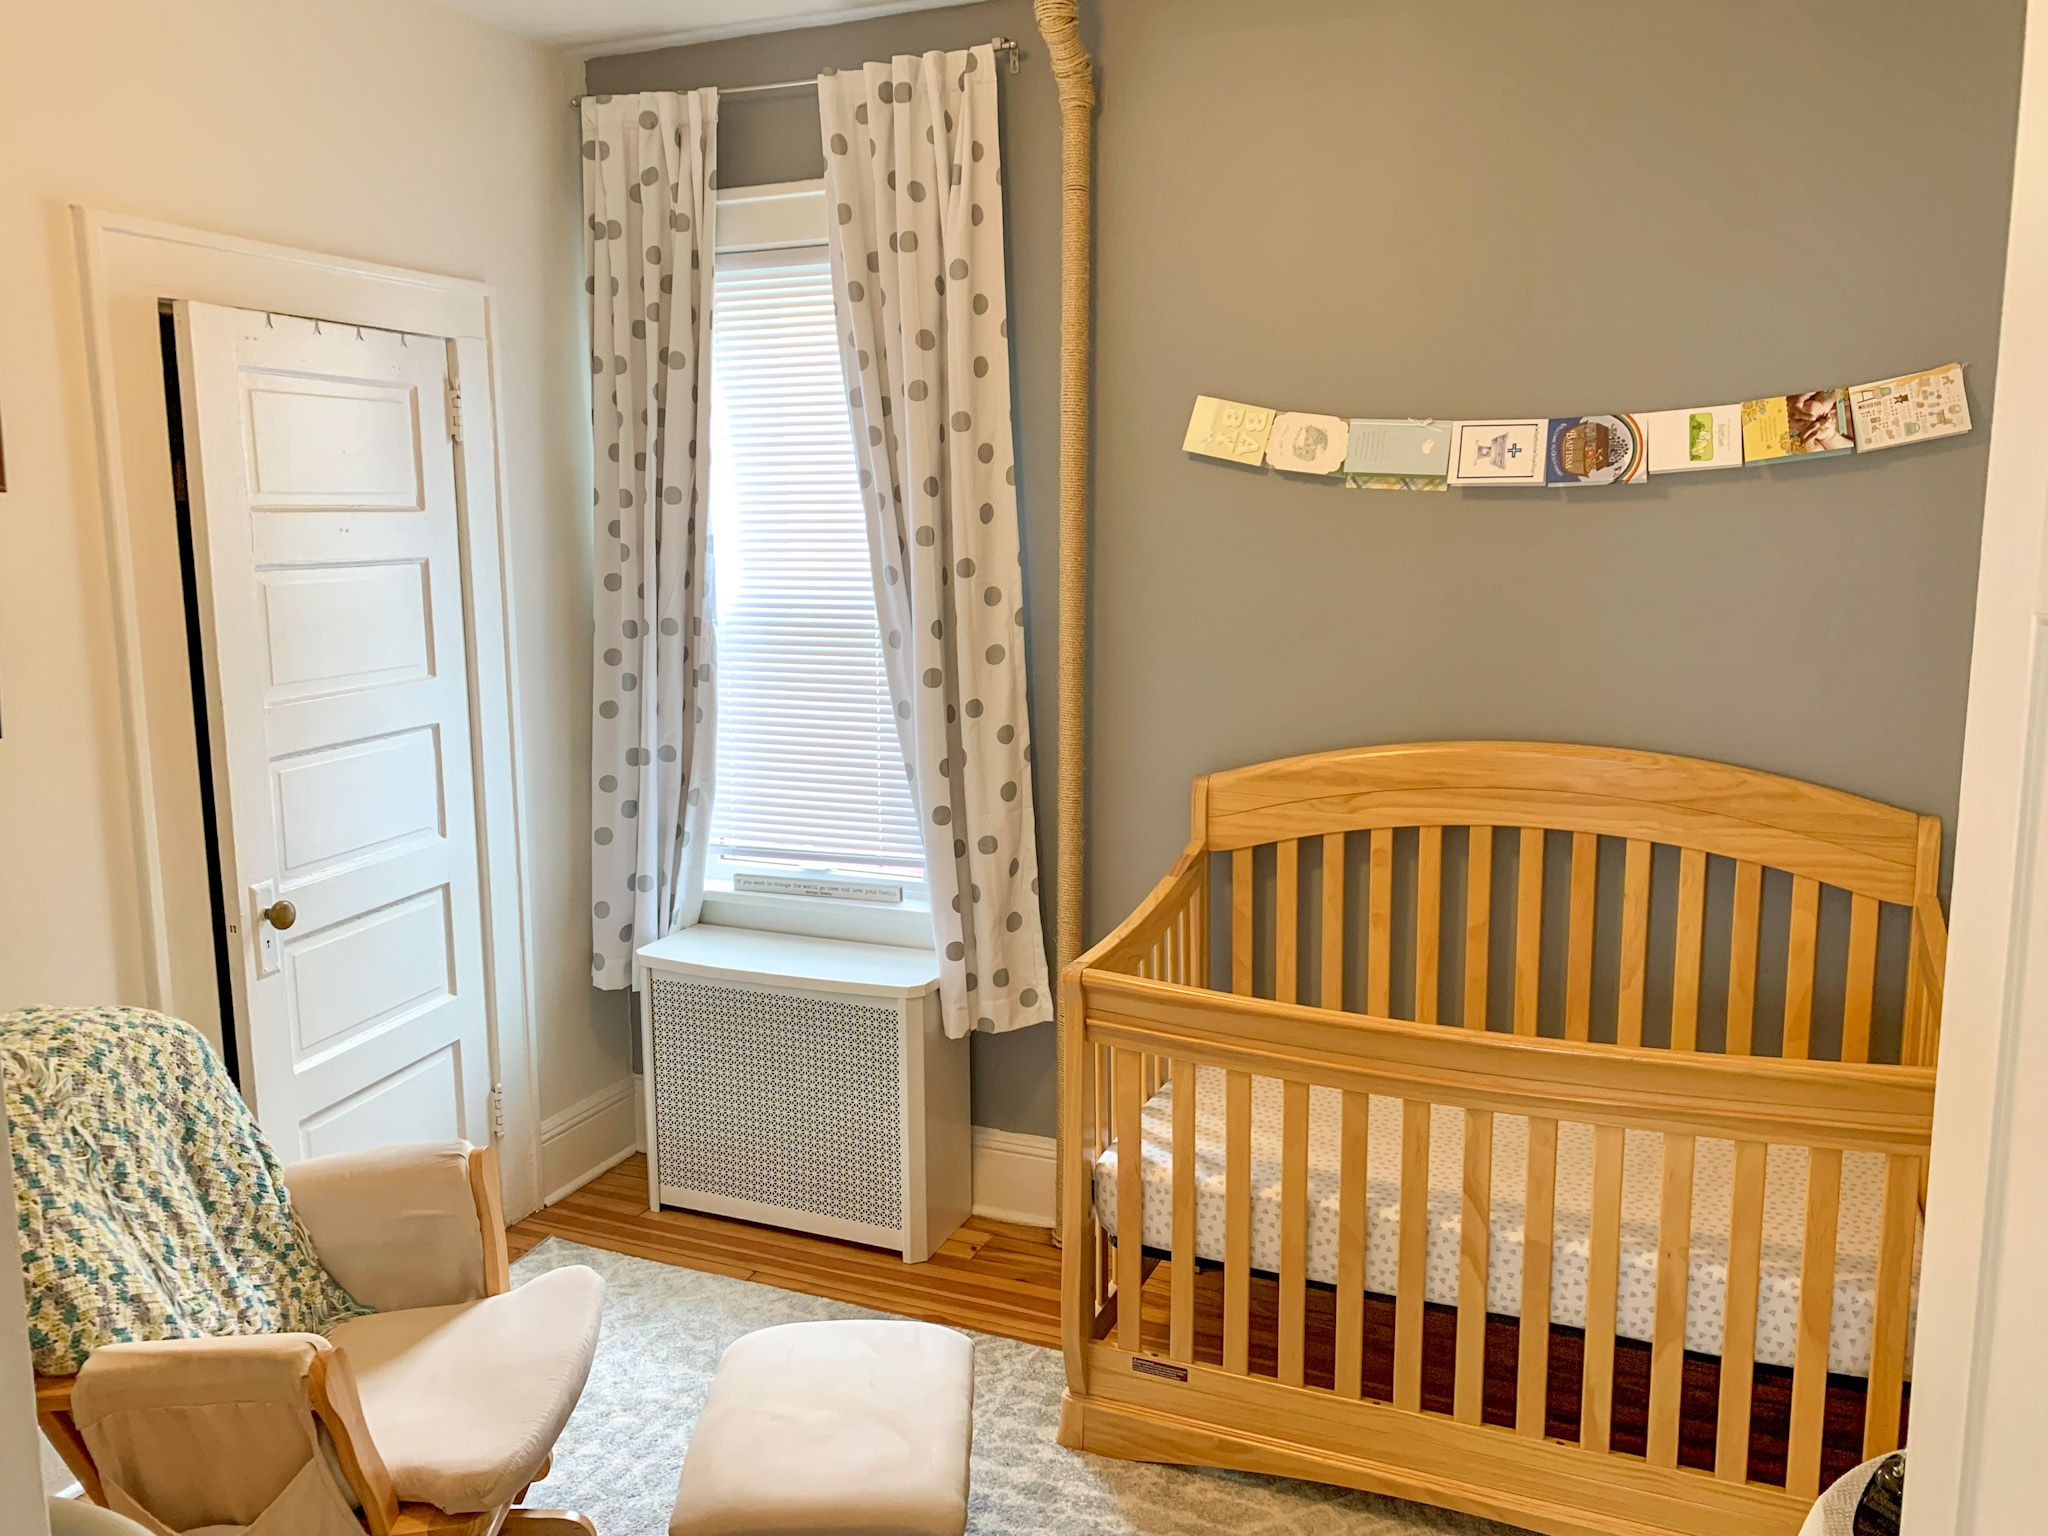
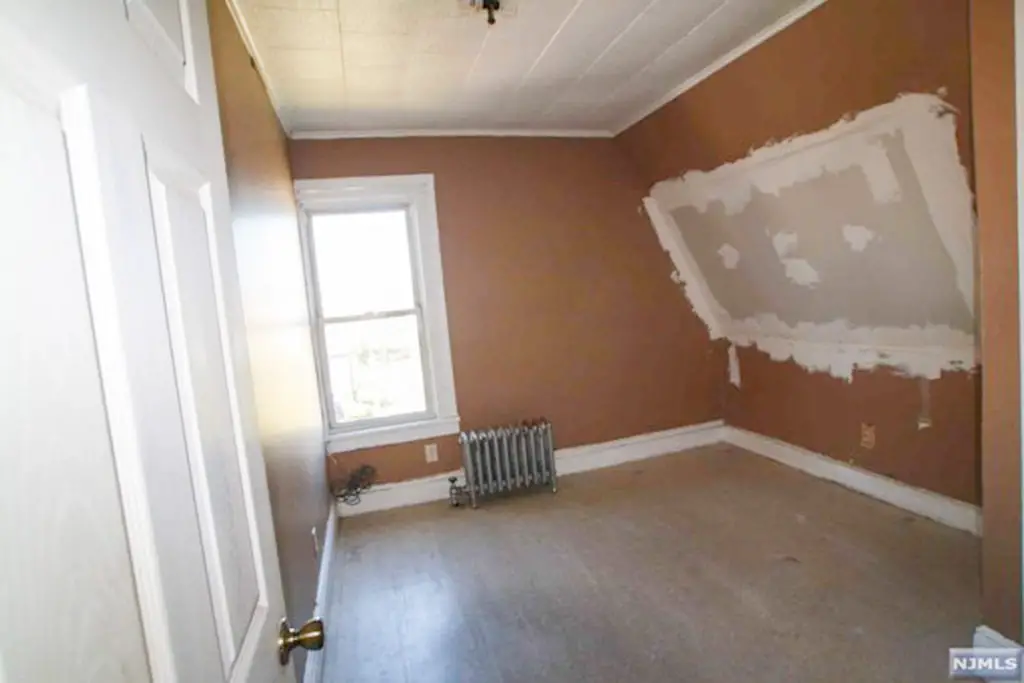
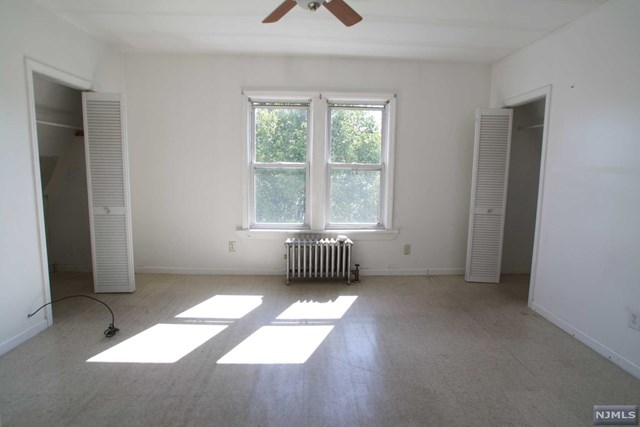
Bedroom #3
When we were staring down our 100 year old house renovation, the first thing we did was look up.
Precipitation is supposed to stay outside.
This fix was technically part of our FHA 203k loan.
Our miserable contractor supposedly had fixed this wall in Bedroom #3, as well as the roof above it.
Neither of those things actually happened.
There we were, my dad and I, one rainy January night, ready to deploy joint compound, in a vain attempt to finish the crappy job our contractor left for us, when we noticed the wall felt… squishy.
Not good.
Dad pressed on the wall again, and it…
…squished some more.
And then it gave.
Yep. His hand went right through it.
And then he kept going… and going…
Until the entire wall crumbled beneath his bare hands.
Just…
There are no words for moments like these, amiright?
We quickly realized we’d be gutting this awful room.
Good thing, too – once we had the ceiling down, it rained again (joy.). The rain turned out to be a blessing in disguise: we found the exact origin of the roof leak, and showed our roofers precisely what to fix.
Once we found the source of the problem, we knew this room would be straightforward: insulate, sheetrock, paint, flooring, window.
Oh yeah, the window. It fell in one night.
It was a stormy night, the window was left unlocked, and we heard a bang…
…ran upstairs to wonder why it was so drafty…
…to discover the top windowpane had face-planted onto the floor.
Blown in.
Belly flopped.
I love my HUD house.
Related: Buying a Foreclosure Home – 10 Things to Know Before Bidding
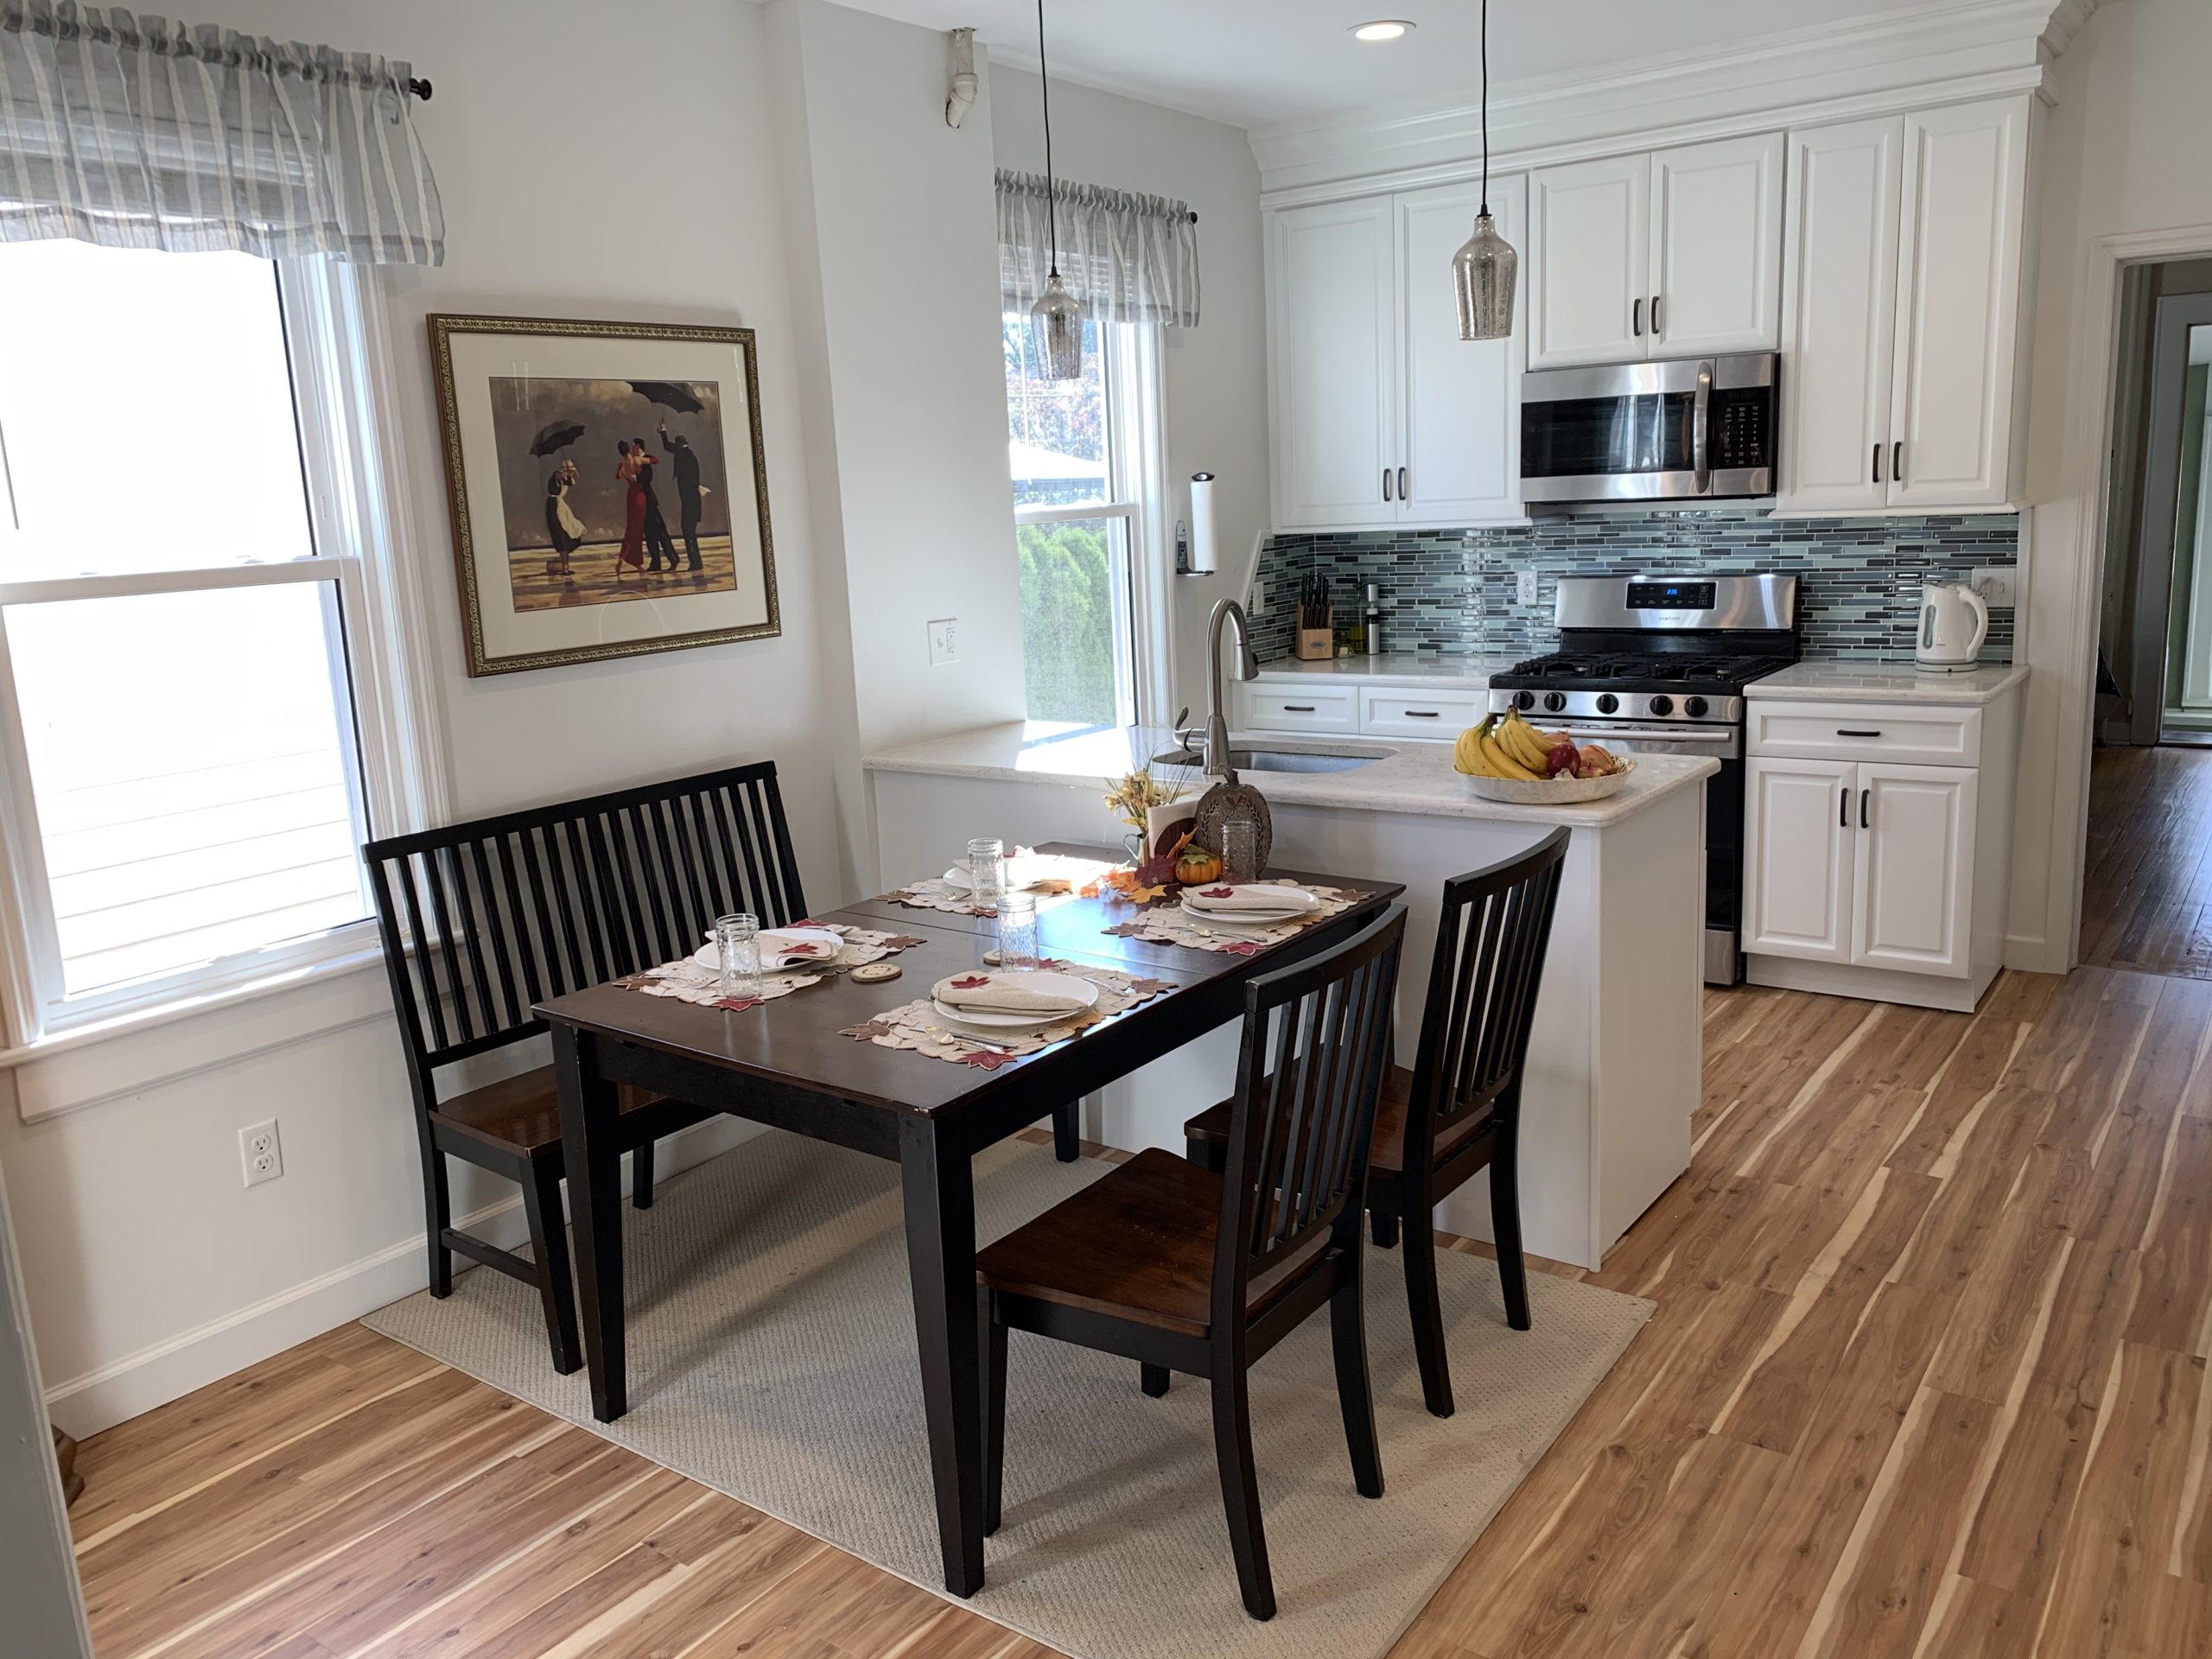
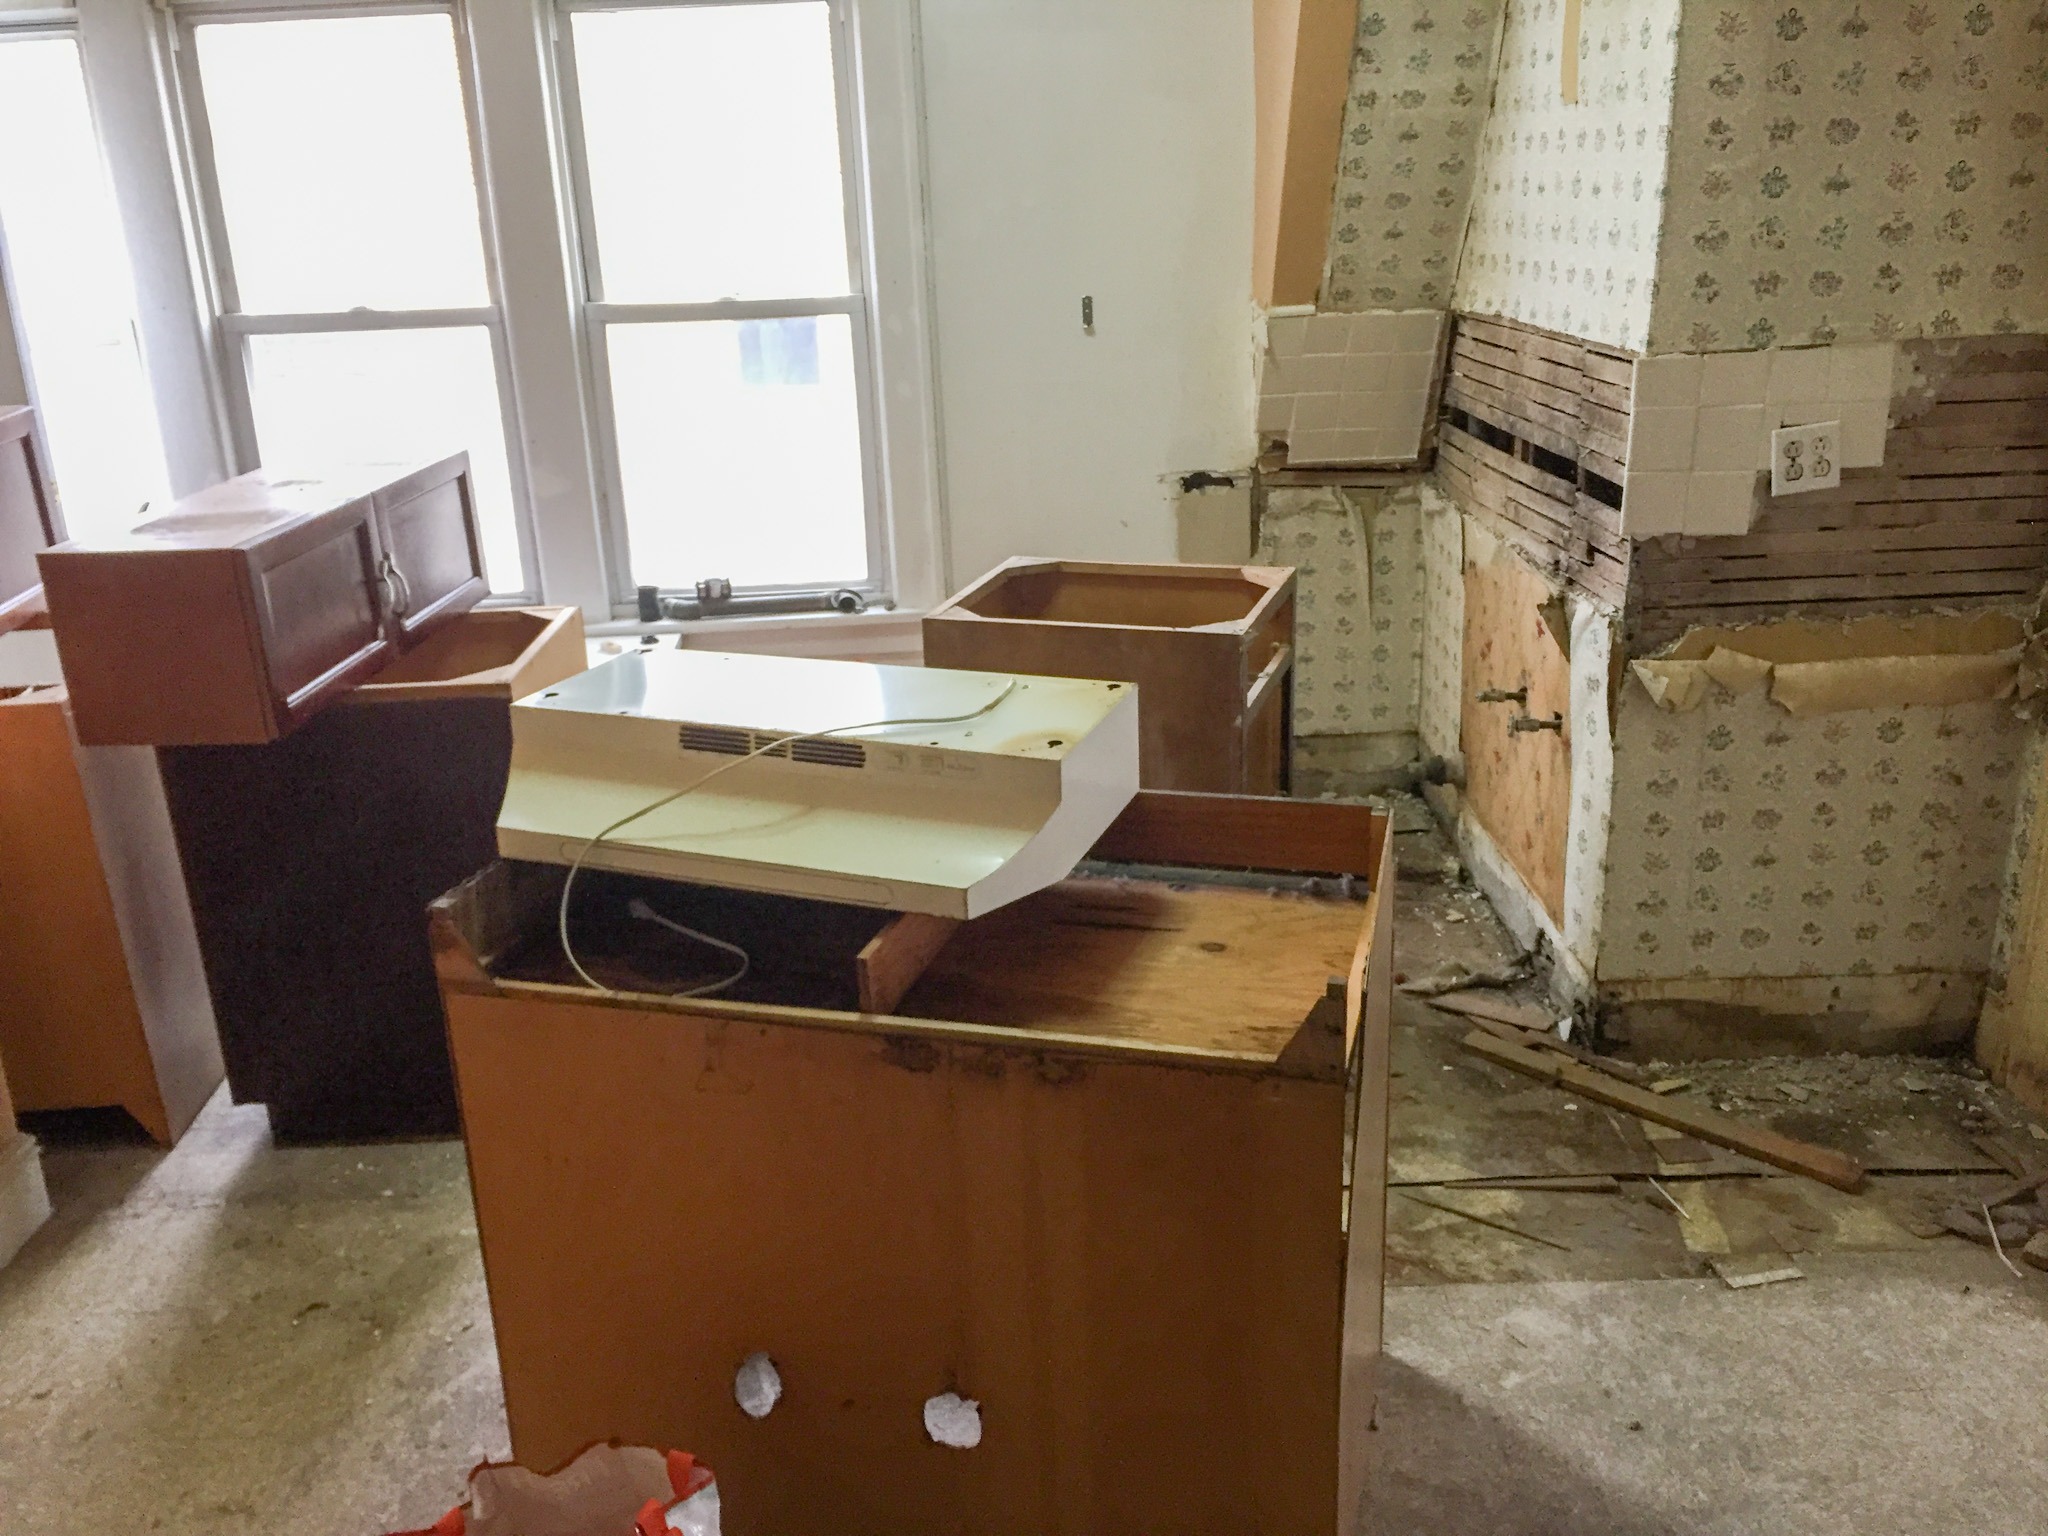
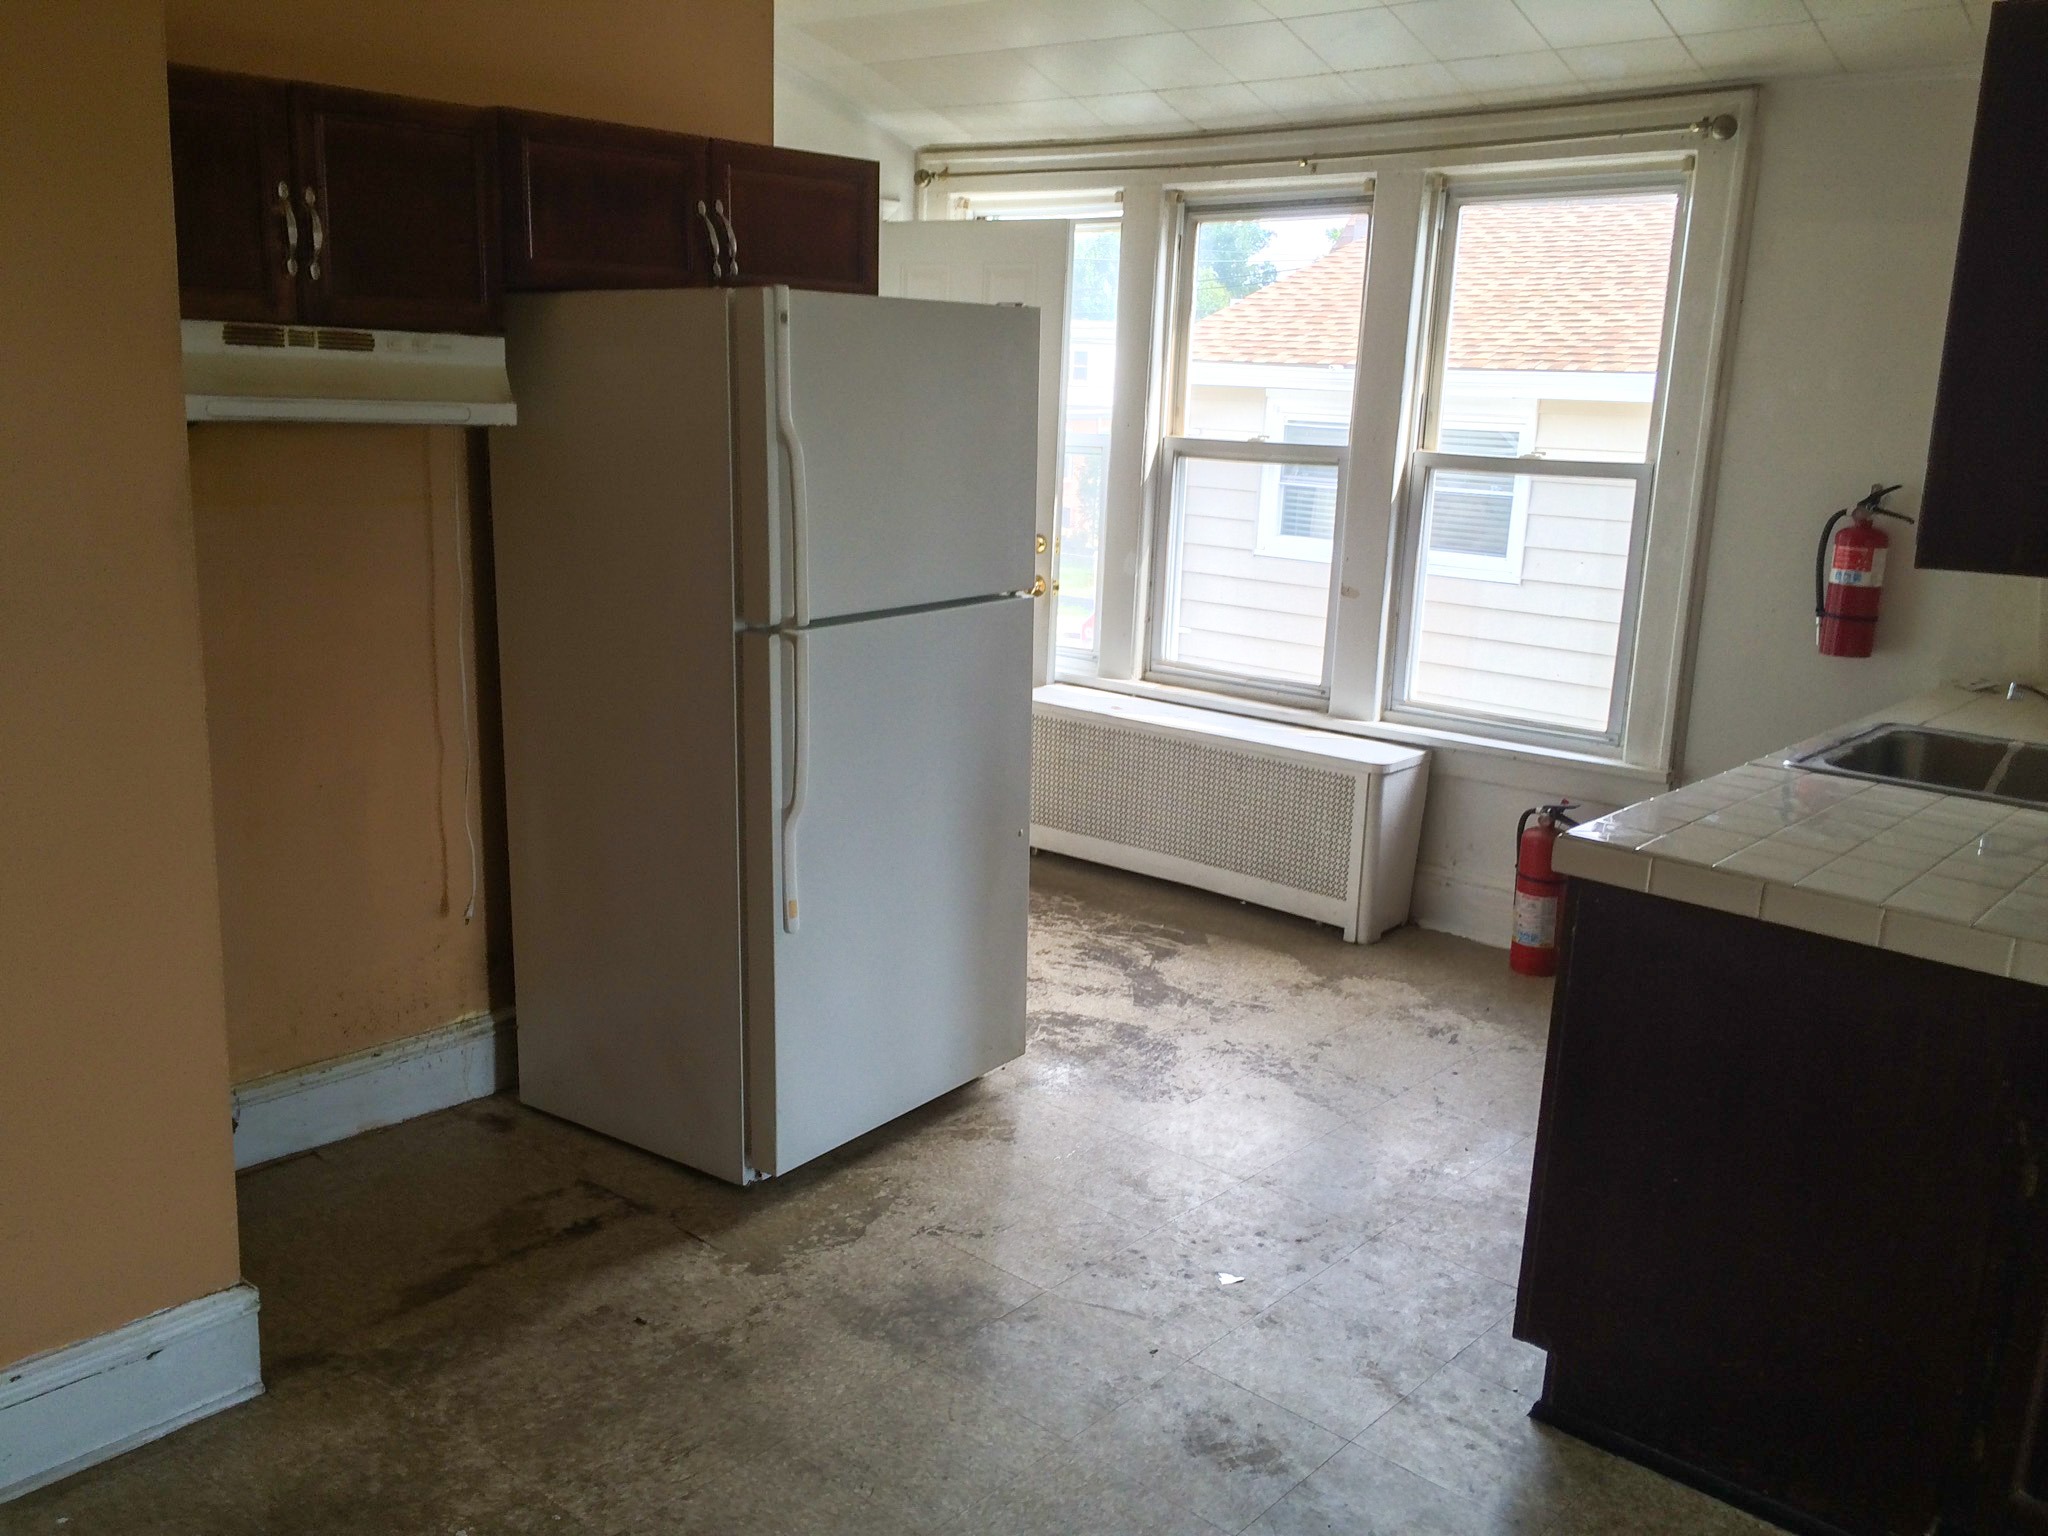
The Kitchen
The layout of this kitchen got on my nerves.
The cabinets, instead of tucking into an L shape in a corner, were sticking out into the room into an L shape in the middle of the house.
With the stove and fridge directly next to each other, the workspace just felt… wrong.
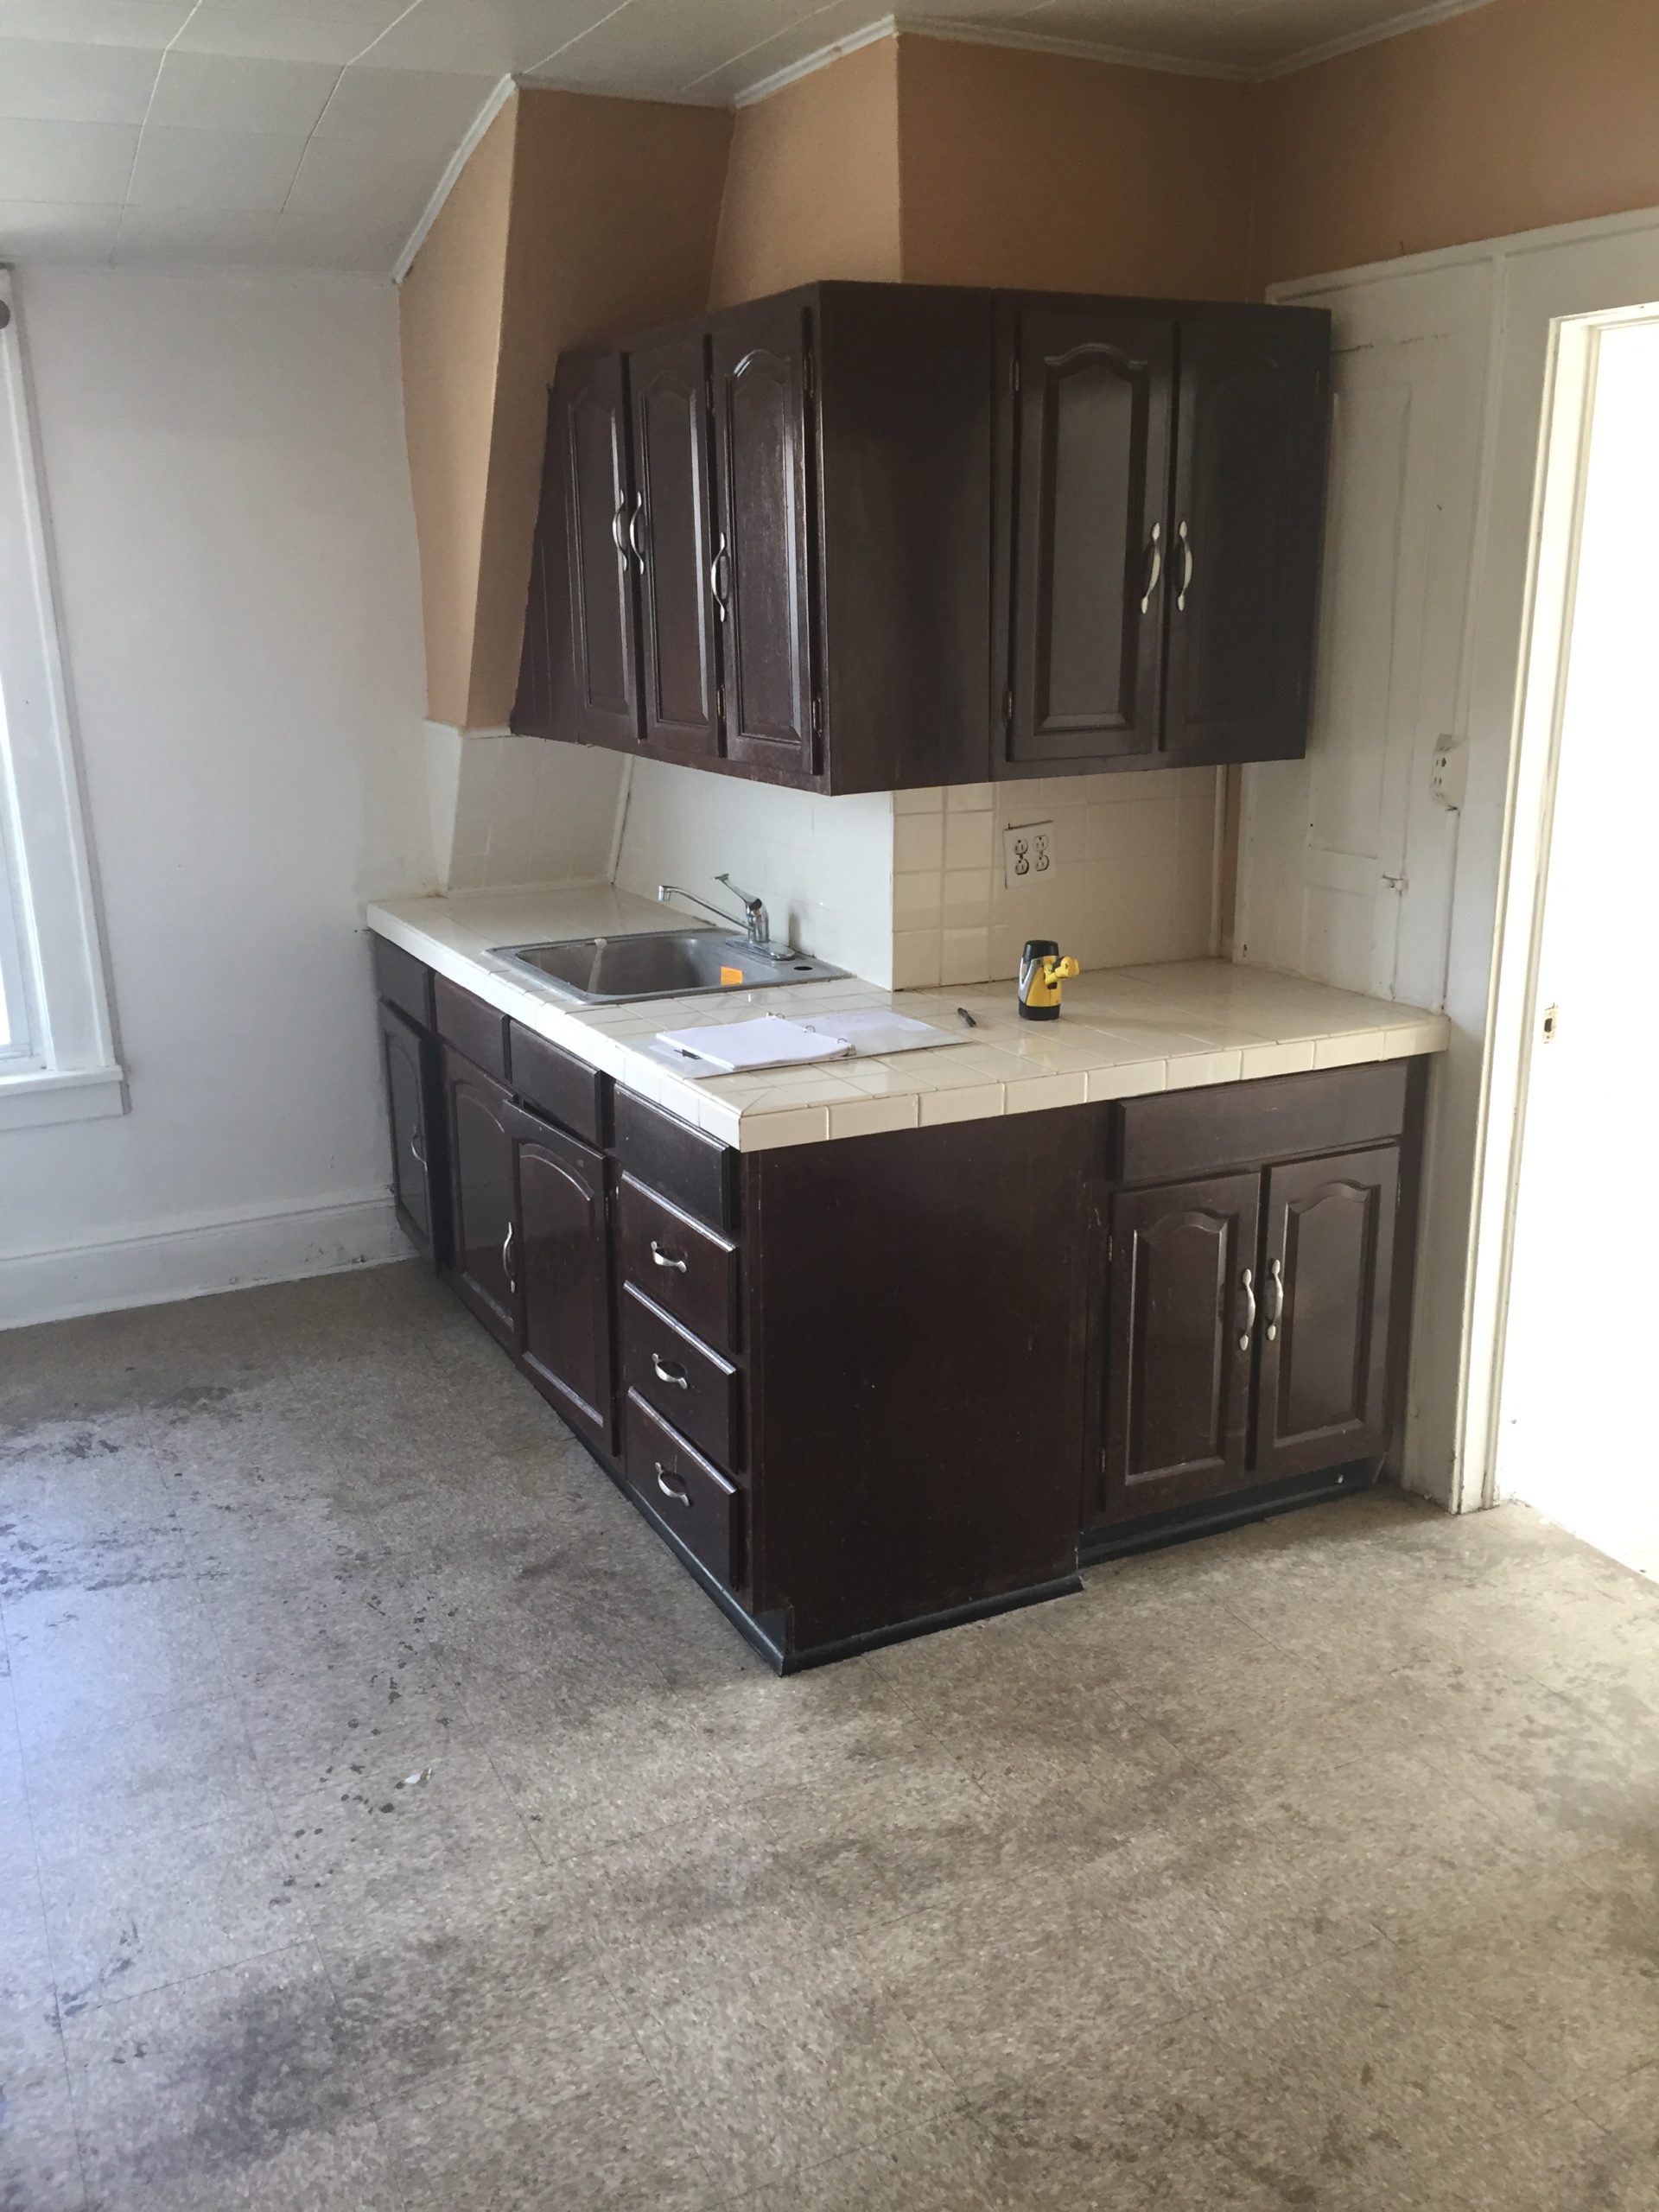
Sure, it’s a succinct working triangle, but it didn’t really flow.
Additionally, the kitchen is the main thoroughfare of the apartment – to get to the bathroom from the two front rooms, you had to walk right through the working triangle.
Side note – now taking bets as to the last time someone had cleaned this floor!!
You can read all about this impressive Old House Kitchen Renovation here.
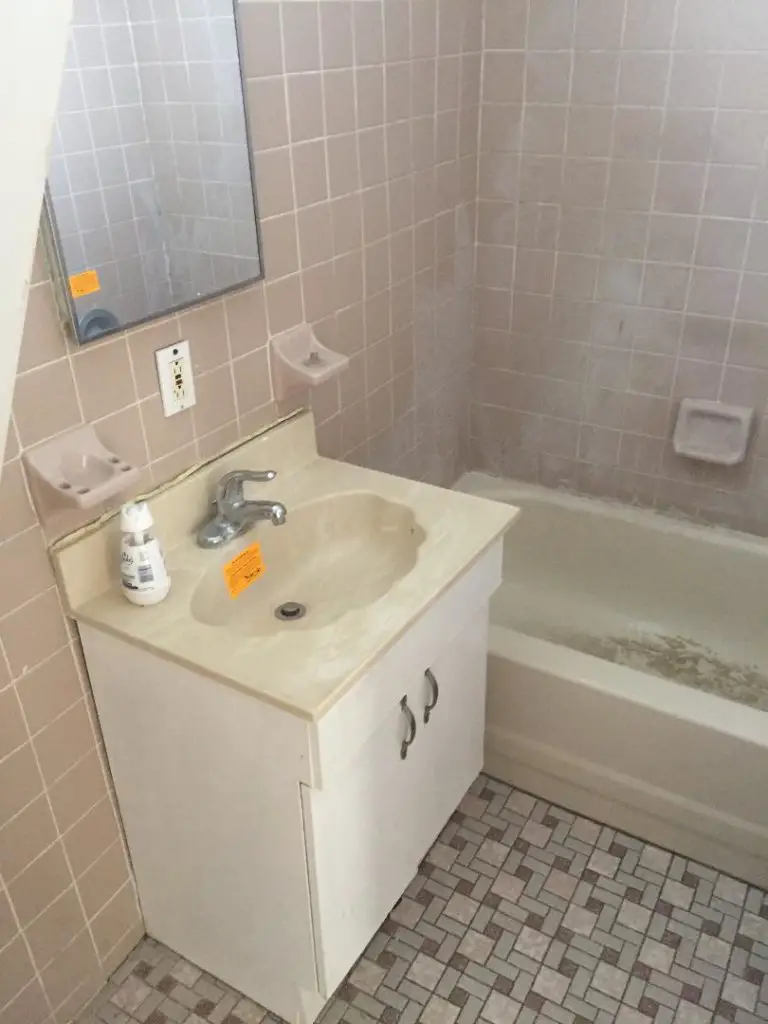
The Bathroom
Come, let’s have a laugh.
What’s wrong with this picture?
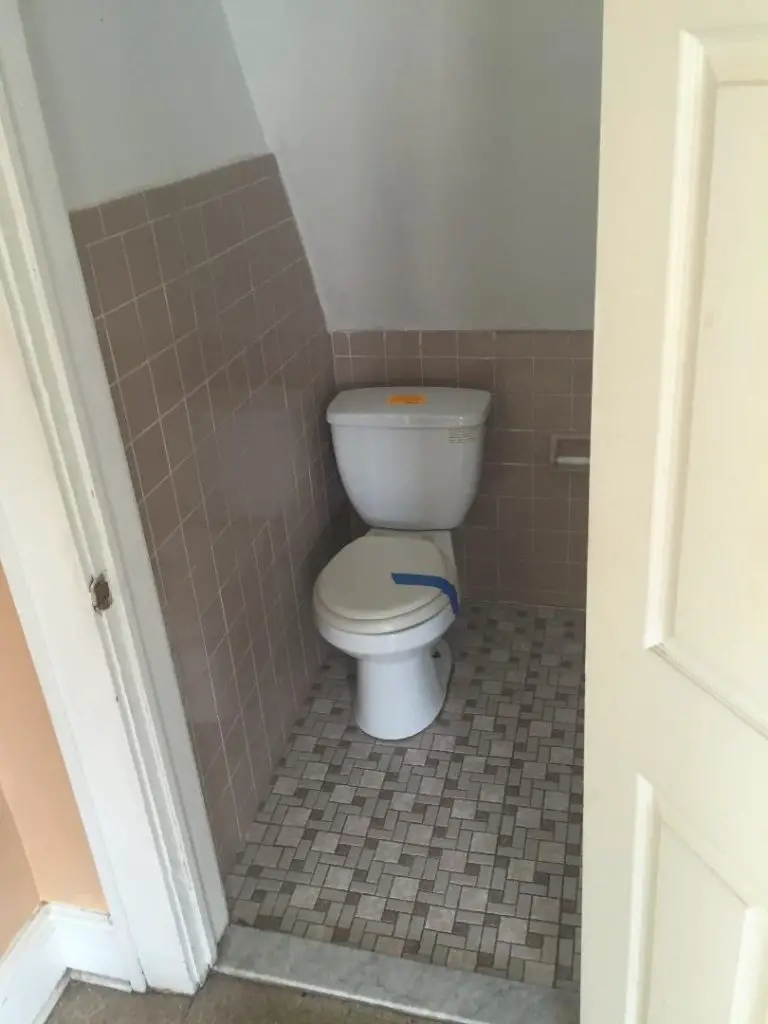
Ah. You’re right! The toilet is too close to the wall.
While yes, it would be convenient to rest one’s head to the right while laying a brick… it’s not quite up to code. The center of the toilet is supposed to be 15” from the side wall. (Source: The Building Code Trainer).
Lovely.
Also, check this beautiful tub! Oo-la-la, doesn’t it just scream “spa night”?
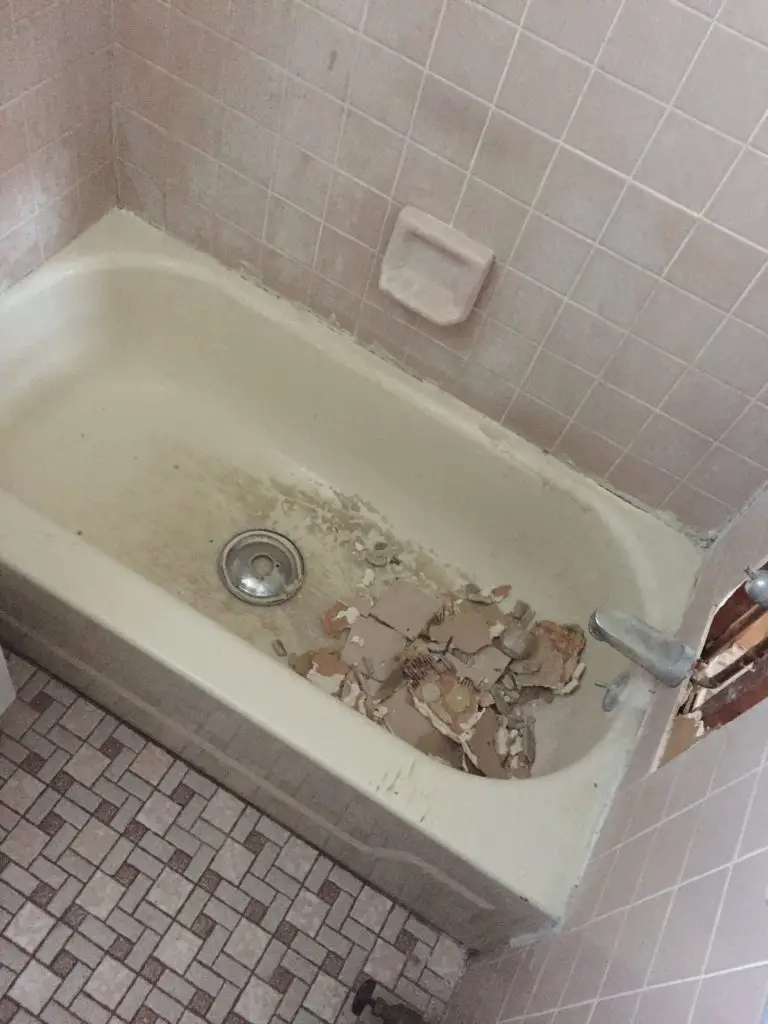
We decided to gut it. Demo day, here we come!
We’d keep the layout the same, but we’d make it prettier and up-to-date.
Check out the rest of the story on our Old House Bathroom Renovation by clicking here.
The Staircase
Oh, and the staircase.
About that.
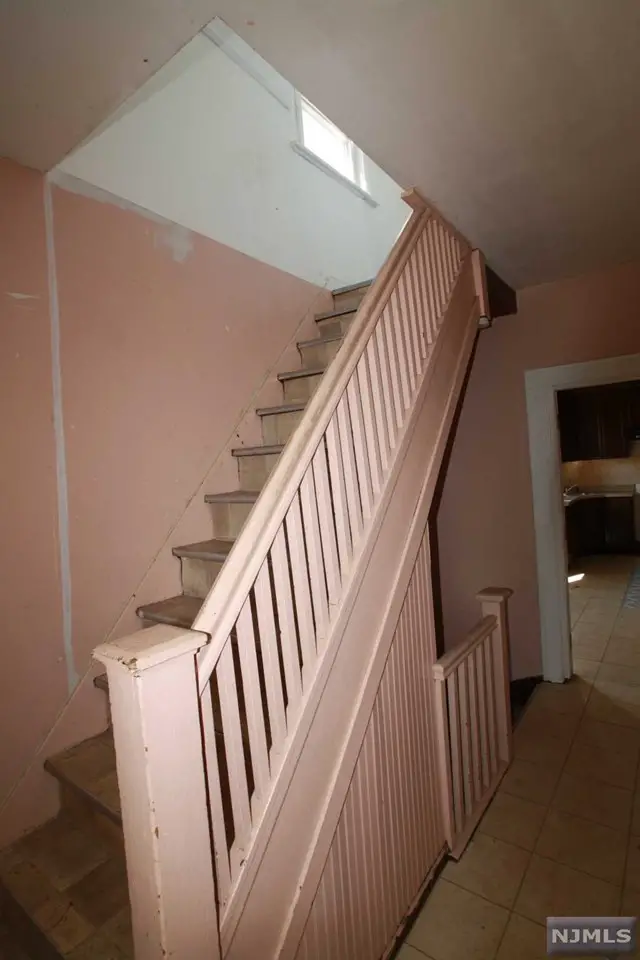
As I mentioned before, our two family house was built in 1912. People were seemingly shorter and had smaller feet back then. Staircases were steeper. And apparently, they had smaller beds.
When we first moved in, we wanted to store an extra queen-sized mattress and bed frame upstairs while we painted on the first floor.
The boys got the mattress upstairs with a little trouble, and then tried the bed frame, only to discover that it wouldn’t fit.
Like, the bed frame wouldn’t fit up the stairs.
The ceiling + the pitch of the stairs + the handrail combined did not allow for a queen bed frame to go up the stairs.
Couple that fact with the stringer (that’s the part that holds the stairs together) was separating from the treads, plus the stairs were too steep for comfort, too creaky for confidence, and too small for a size 9 or higher shoe to properly plant when stepping on them…
We were looking at a new staircase.
I LOVE MY HUD HOUSE.
Here’s the rest of our Old House Staircase Remodel.
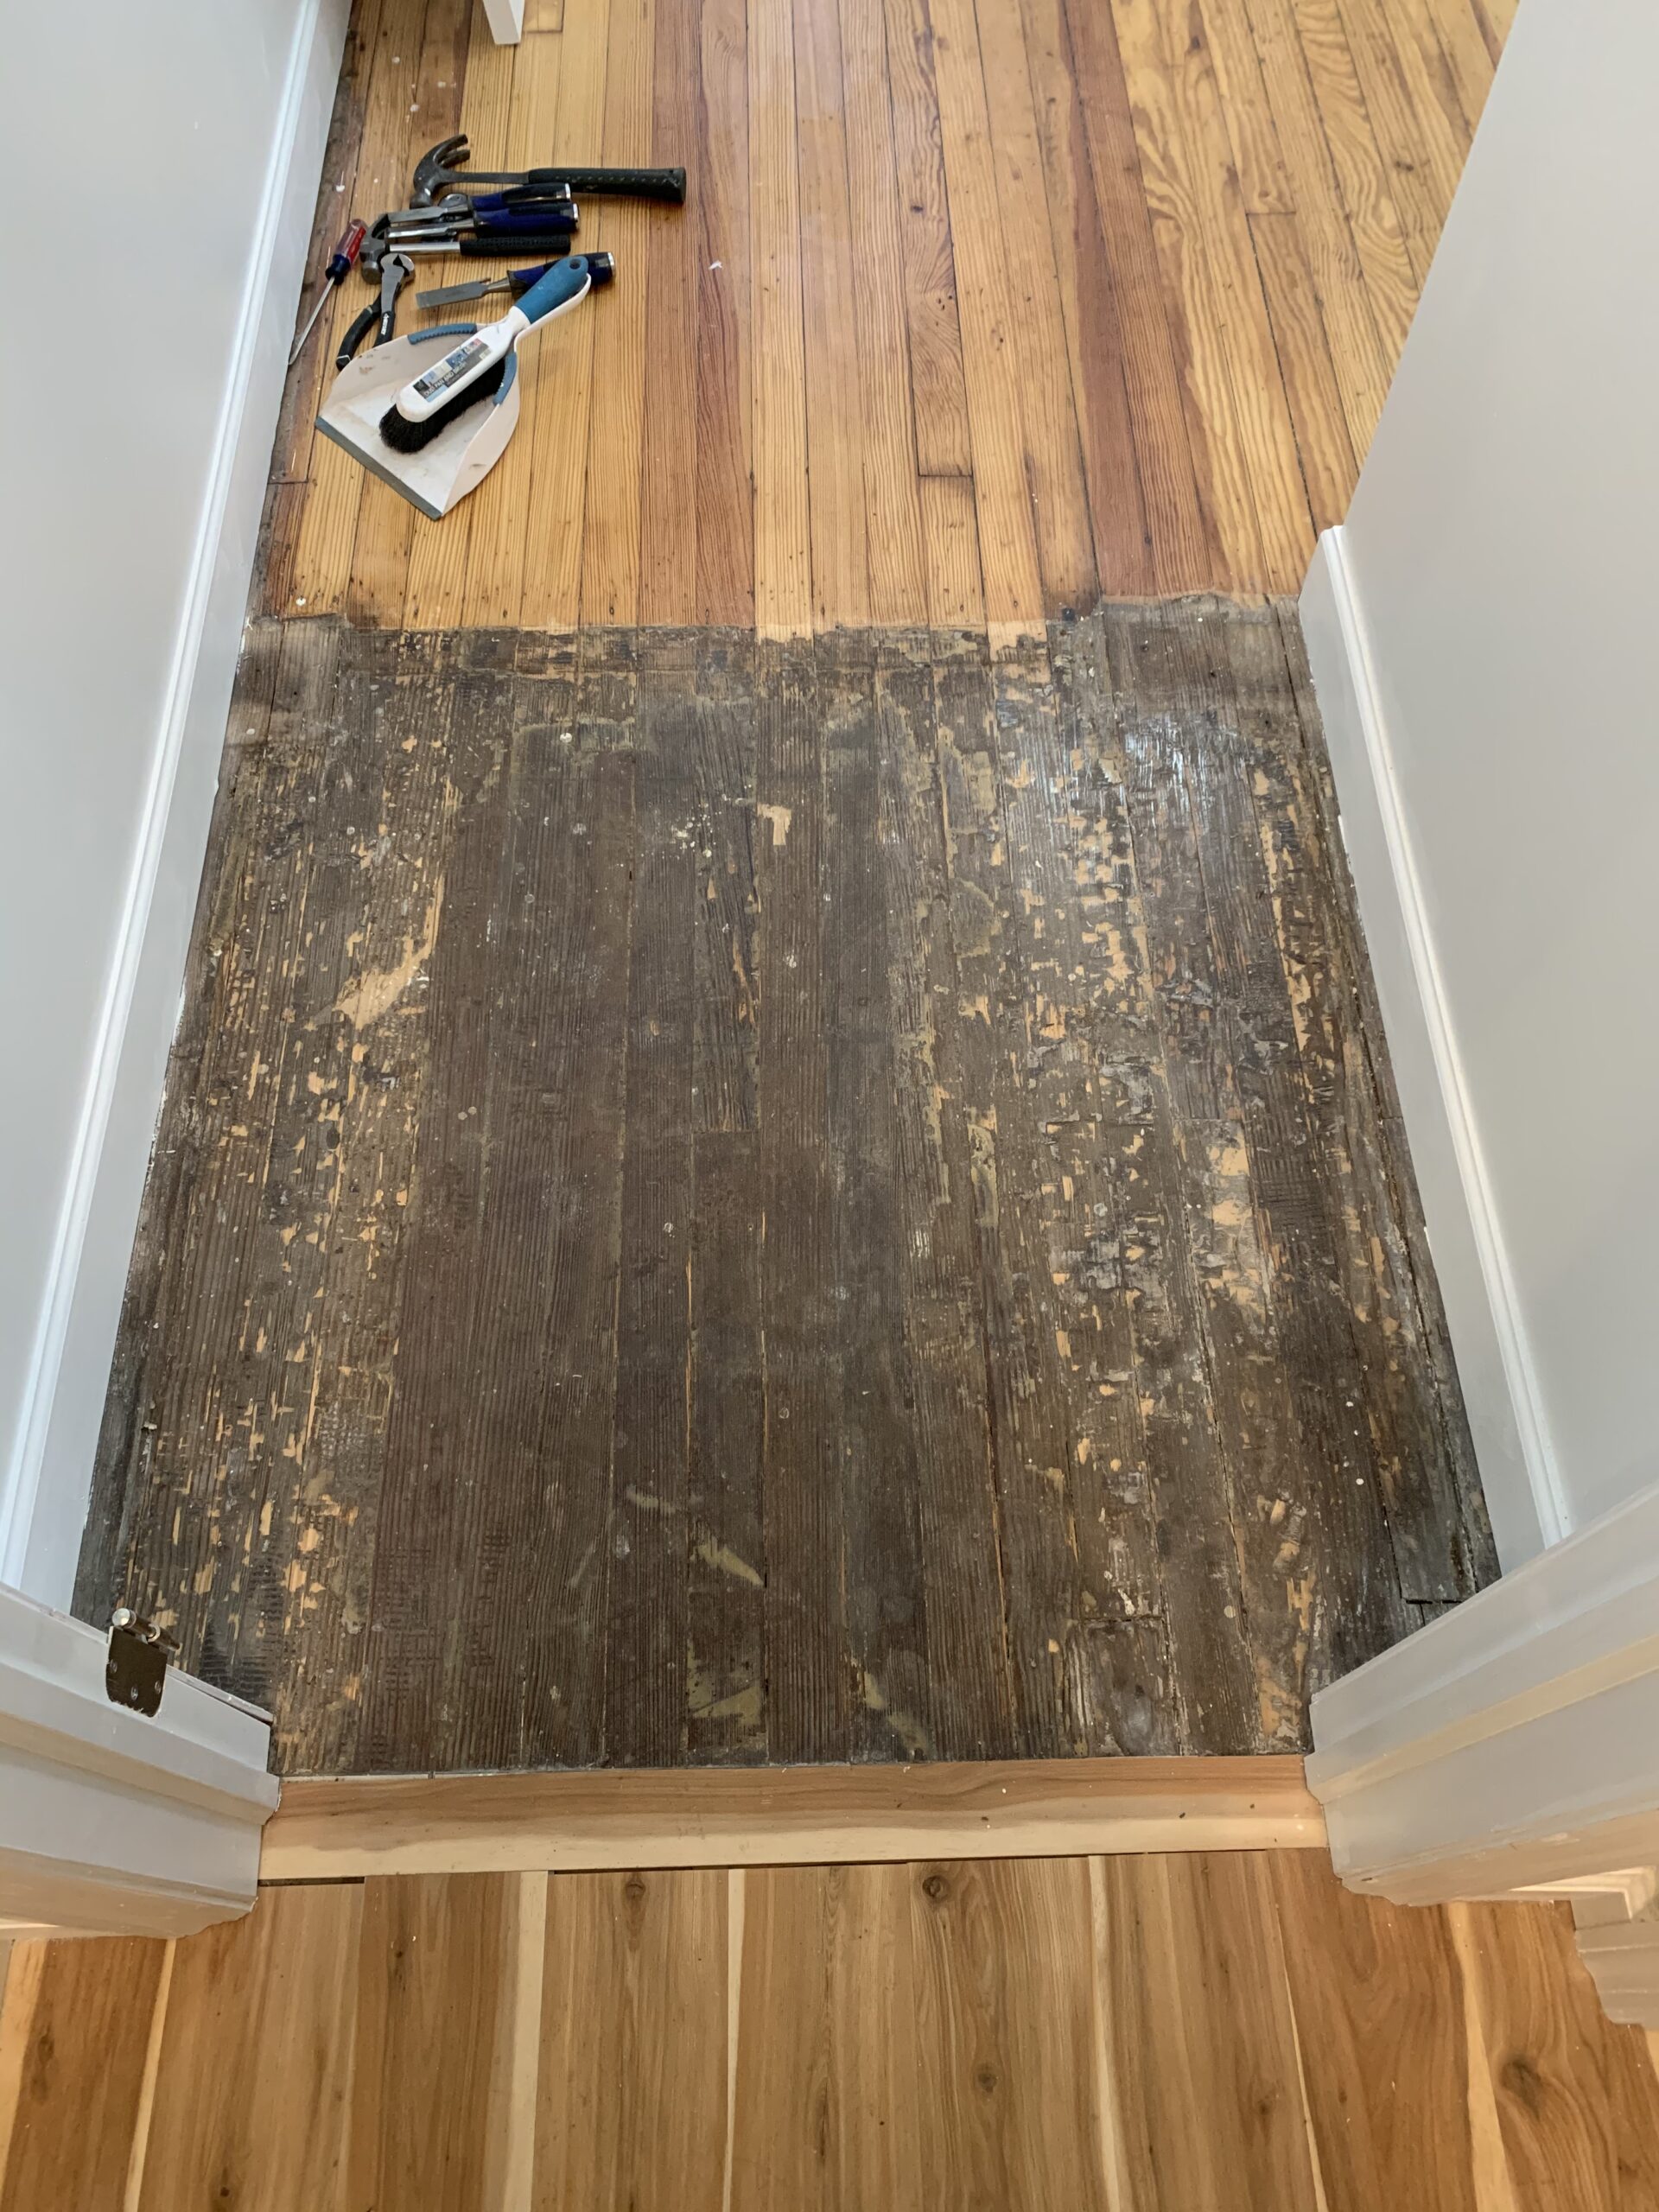
Cosmetics
The rest of the apartment – the 2 other bedrooms and a living room – needed some new windows, fresh paint, and a flooring facelift. Cosmetic stuff, really.
After receiving eyeball-popping numbers from general contractors, we decided to save money on our home renovation by doing some of the project ourselves, and decided to point and pay on things like plumbing, electric, and the windows.
Conclusion
Looking back, Derek and I had zero idea what we were doing with this 100 year old house renovation. Ignorance truly was bliss.
We were so lucky to have people in our lives to guide us in the right direction and show us how it’s done!
Here is the rest of this series on our 2nd floor, where we explore the kitchen, the bathroom, and the staircase:
- Impressive Old House Kitchen Renovation – the 2nd floor part 2
- Old House Bathroom Renovation – the 2nd floor part 3
- Our Amazing Old House Remodel – the 2nd floor, part 4